Web Inspector is a powerful tool that lets you view all resources and activity on a web page. This post will guide you through some of the tool’s most useful features and how you can use them to aid in your own web development.
Navigating to Web Inspector
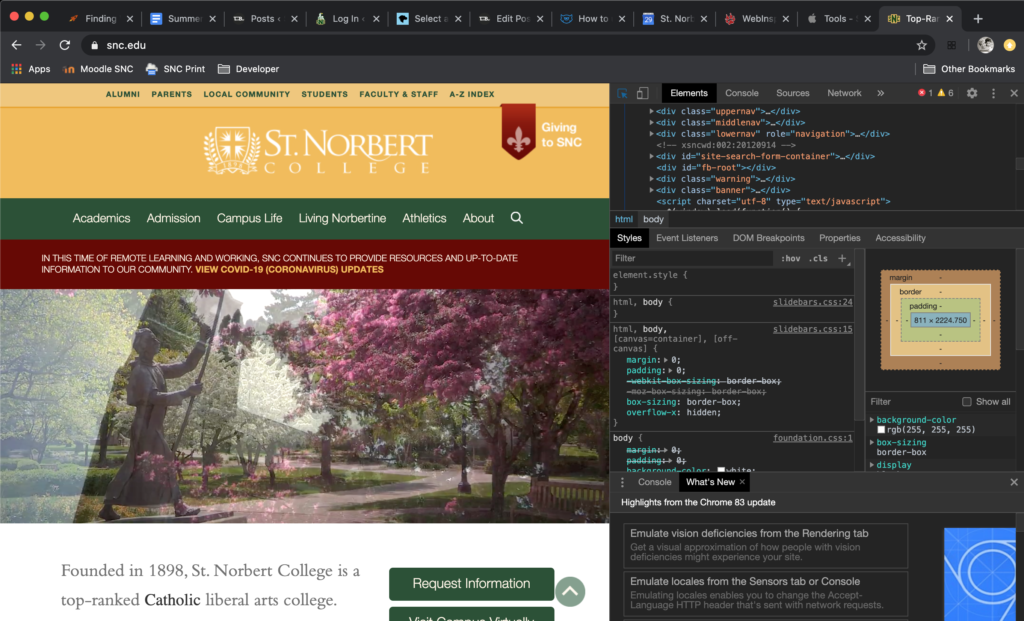
To open Web Inspector you can press Command+Option+C (Mac) or Control+Shift+C (Windows, Linux, Chrome OS). This is what your window should look like when Web Inspector is active:
Selecting a Specific Element in Web Inspector
If you wish to inspect a specific element on a webpage to learn more about it, you can simply right-click on the element and select “inspect”.

Locating the Element’s Class Properties
When you have an element selected, you can make changes within the web inspector to see how the webpage might appear if edits were made to the element. As you make edits within the inspector, the webpage will give you live updates as to how your changes would appear. Hovering over the code sections in the top right section of the inspector window will highlight the element on the page it’s referring to if you’re having trouble locating a certain element. You may have to expand a section to locate it.

Once you have found it, click on it.
Under the styles tab within Web Inspector you can view all the CSS properties that belong to the HTML element/class you have selected. These too be manipulated to affect the appearance of the webpage. Just like hovering on code in the top section of the inspector window highlights that element on the page, hovering over different style elements does the same (pictured below)

You’ll notice that the styles tab is segmented into different sections. Editing some of these sections will affect the stylization of just the element you chose to inspect, but adding edits to other sections will affect an entire class that that element belongs to.
Once you have found the element or class you would like to manipulate, try playing around with the stylization of the elements on your webpage. If you find the class of an element you want to make a permanent change to, you are able to bring that into the “Additional CSS” tab in the WordPress Customizer to further customize elements on your site. For example, the above highlighted title has its stylizing under the following:
.elementor-642 .elementor-element.elementor-element-4f9fcd00 .elementor-heading-title{

}
If you want to change that text’s color, you can put the CSS code within that class in the “Additional CSS” tab and change the element.
.elementor-642 .elementor-element.elementor-element-4f9fcd00 .elementor-heading-title{
  color: red;
}
If you’re having trouble finding a class, do not worry. Finding CSS classes can take time and practice. You are always welcome to make a Tech Bar appointment if you need additional assistance.