A subdomain is one way of organizing and separating content on your site. To create a subdomain, use the following steps:
Creating a Subdomain
- Log into Knight Domains with your SNC email and password to access your cPanel.
- Once logged in, scroll down and click the Domains icon under the Domains section of cPanel.

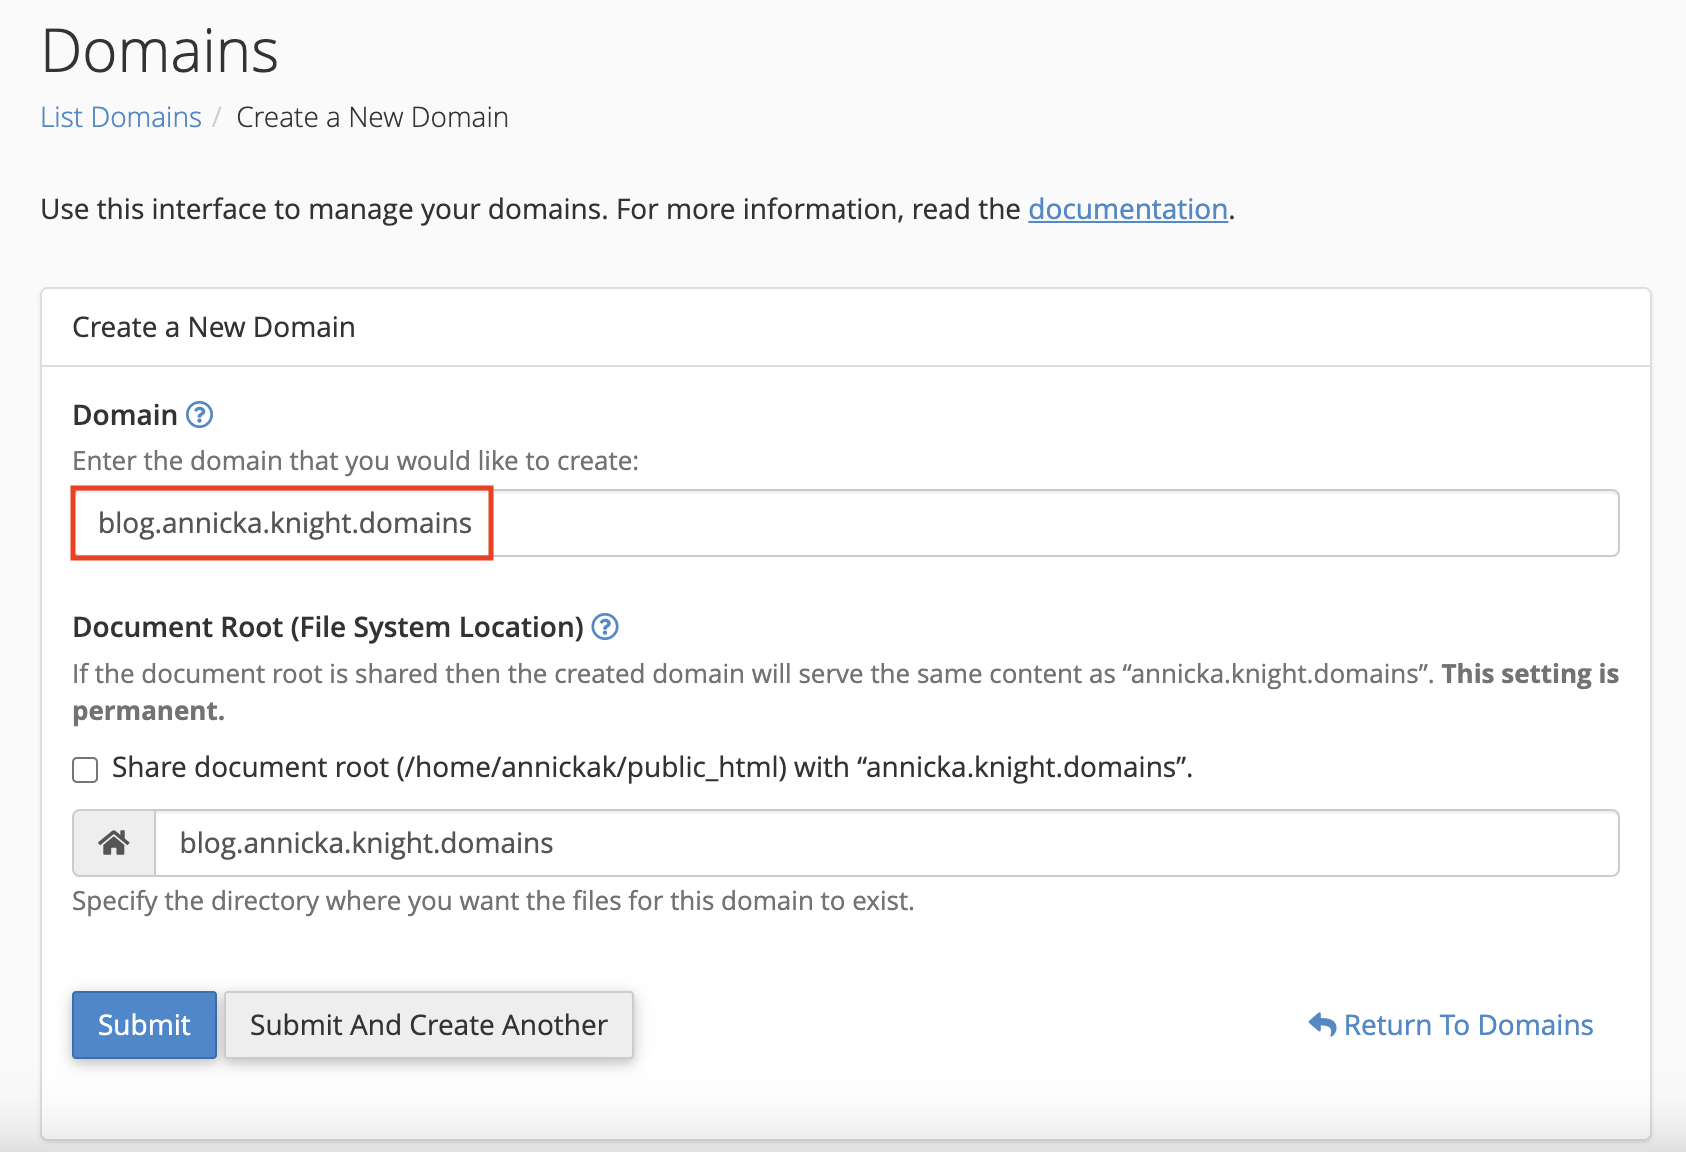
- On the next window, select the Create A New Domain button in the top right-hand corner:

- Enter your preferred subdomain under the Domain field. In this case, the account domain name is annicka.knight.domains and the new subdomain will be blog.annicka.knight.domains.

- Enter the directory where you want the files for this subdomain to exist under the Document Root field. Most folks can just leave this how it’s configured by default. (cPanel used to put all subdomains in the public_html folder by default, but now any new subdomains will default to the root directory of the user’s account).
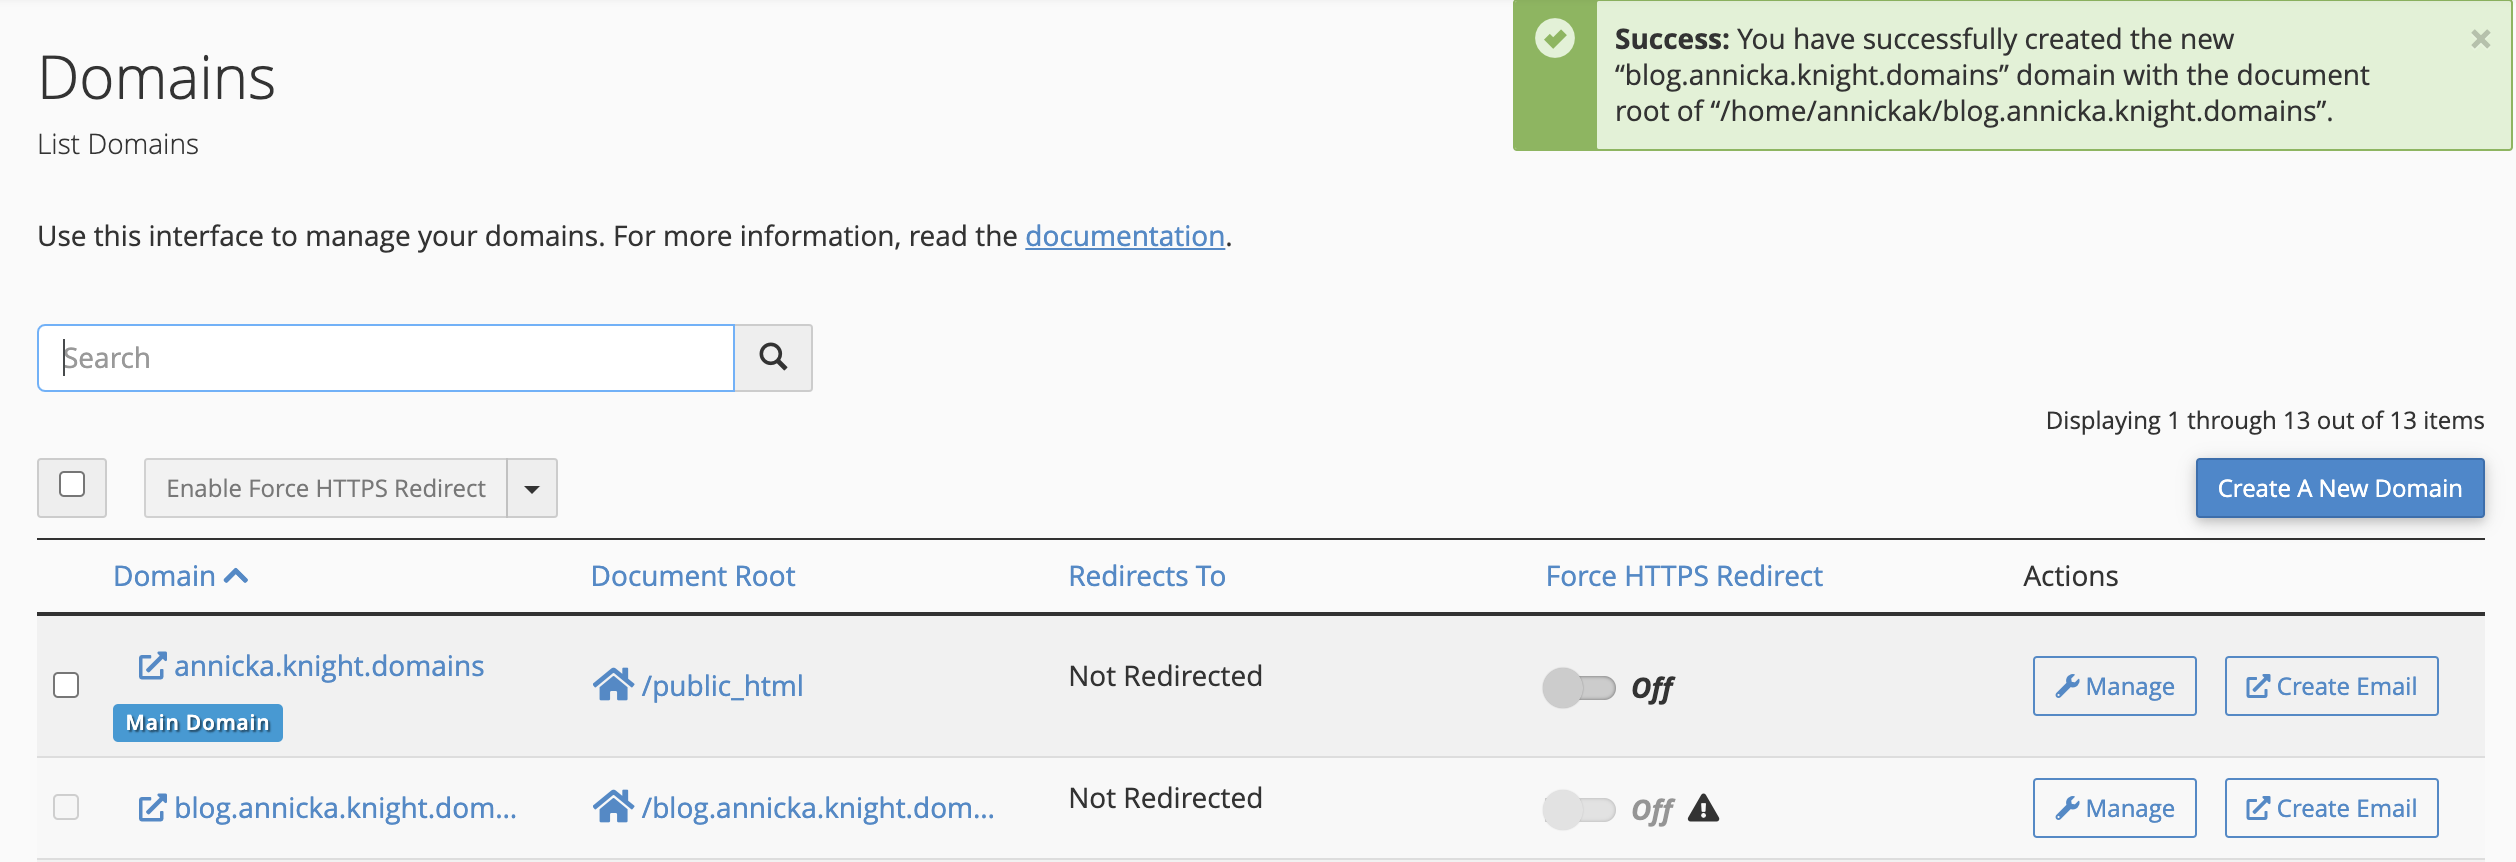
- Click Submit to create the subdomain. When successful, your window will redirect back to the full list of Domains in cPanel, including your newly created subdomain:
- (After a few minutes, LetsEncrypt will automatically provision an SSL certificate on the new subdomain. Once that happens, you will be able to enable the Force HTTPS toggle.)

Your subdomain will now be available as an option for automatic installation of various software (WordPress, MediaWiki, etc). If you prefer to install web applications manually, you can do so in the document root (folder) you created in step 5.

Modifying a Subdomain
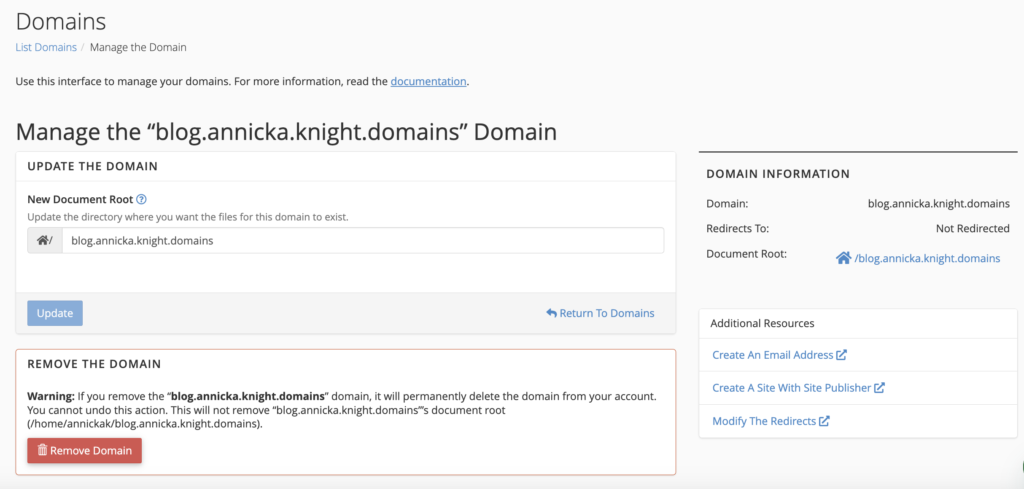
You can view and modify all of your domains, including subdomains, from the main Domains Icon, as shown above. Click the Manage button next to the domain that you wish to modify:

cPanel provides the ability to modify the Document Root (ie. the folder that the subdomain’s files are served from), create a Redirection to redirect to a different URL (for example if you wanted facebook.yourdomain.com to redirect to your Facebook profile’s URL), and to delete subdomains entirely via the Remove link.
