
1.Moodle Minimum
Welcome to Moodle! Moodle is a learning management system (LMS) that allows instructors to connect with their students online. Via Moodle, students can submit assignments, participate in online discussions, take quizzes, and view grades. Instructors can use it to communicate with students, share documents, manage assignments, facilitate online discussions, as well as post activities, resources, and manage grades.
After logging into Moodle (moodle.snc.edu), instructors will find that their courses appear in their dashboard. All SNC students have access to Moodle and their registered courses are automatically populated as well.
With Moodle, students have access to all of their courses, even if this LMS is not being used by instructors. It is an easy way for students to view their courses all in one spot. Because of this, instructors may want to consider adding as a minimum, the following items to their courses, even if they are not using Moodle as their LMS.
- Provide availability and contact information
- Supply a syllabus for the class
- Add links to additional resources such as an online textbook, class website, or alternate LMS/domain as needed
1.1.Before we get started
Before we can make any changes to your course we first need to get to your course page and “turn editing on.”
- Visit Moodle at moodle.snc.edu
- Click log in at the top right corner of the screen, then log in using your 6-letter login id and SNC password
- Click on the name of your course.
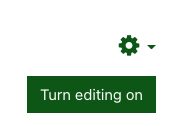
- Under the gear icon, click “Turn editing on”.

1.2.Adding text to the page
The fastest way to add availability, contact info, or any other information you want students to have quick access to, is to edit the summary at the top of every course.
To get started, click the Edit (1) button at the top of your course page, and select Edit section (2).

Use the text field labeled Summary to add availability, contact info or anything else you’d like. When you are done, scroll to the bottom of the page and click Save changes.
After you clicking Save, your text will appear at the top of your course page:

Tip!
You can also include images, links, videos and other resources in the Summary field, or just about anywhere you can type text in to Moodle. If you want help with this, contact the ITS Service Desk and we can help you out!
1.3.Uploading files
Moodle is a good place to share files with your students, including your syllabus.
From your course page, click the Add an activity or resource button.
In the Activities and Resources chooser, select the File resource, then click the Add button at the bottom of the window.
In the Name field, enter a name for the file you’ll be uploading. Select a file to upload by clicking the blue arrow, then Choose File. Once you’ve selected a file, click Upload this file, then scroll to the bottom of the page and select Save and return to course

Shortcut!
As long as your Moodle page already has editing turned on, you can also upload files by simply dragging and dropping files from your desktop right on to your course page!

2.Course Development
2.1.Edit My Moodle Profile and Add a Picture of Myself
To get started, make sure the picture you want to set as your profile picture is on the computer you’re setting the picture from, then login to Moodle.
Click the arrow next to your name, in the upper right corner of the window, and select “Profile”.

Select “Edit profile” on the next page.

On the next page, you’ll need to scroll down, until you see “User picture”. Then, you can either drag and drop your image onto “You can drag and drop files here to add them.” or click on the green “Files” button which will open a Finder window (macOS) or an Explorer windows (Windows) so you can navigate to where your image is located.

Once your picture has been uploaded, scroll to the bottom of the page and click “Update profile”.

2.2.Using the Announcements Forum
By default, all courses in St. Norbert Moodle have an “Announcements” forum.
There are a few useful things about this forum.
1. All students are automatically “Subscribed” to this forum, so they’ll receive emails whenever you add an update to it.
2. The content of a forum post can be many things. You can use it to post a video, link external content, provide a set of expectations, and much more.
3. It has all of the attributes of a forum, so students can publicly reply to your updates.
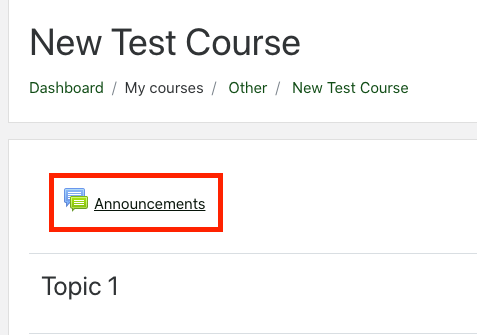
To create a forum post, click on “Announcements” in the course.
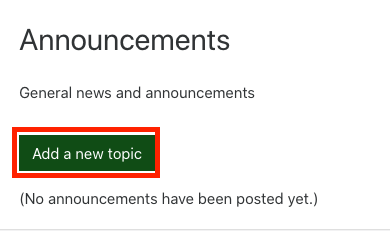
Click “Add a new topic”
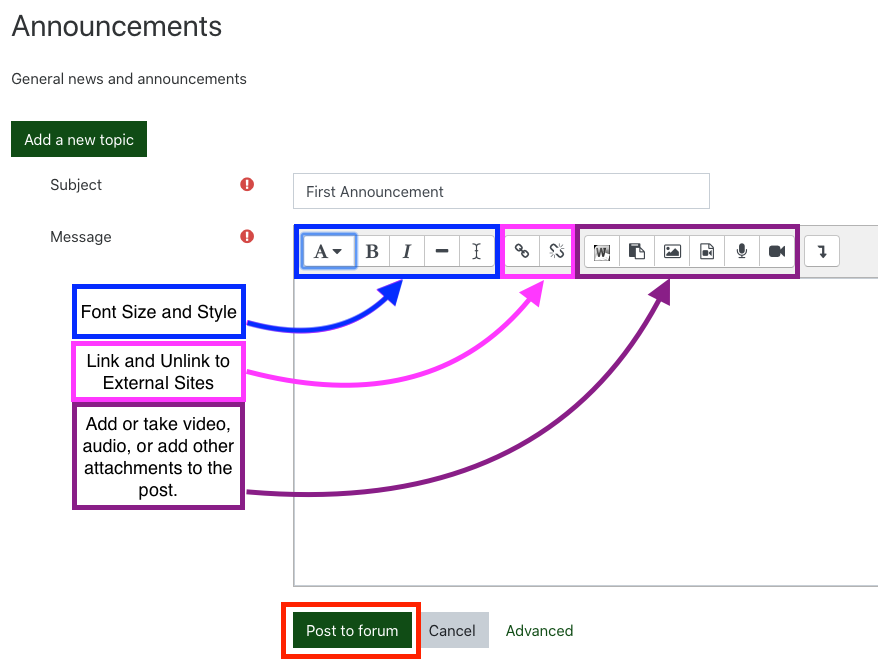
Then, you get to create an announcement. You can customize font size and style, link external content, or place images, videos, and other attachments in-line in your announcement.
Once you’re done adding your content, click “Post to forum”, near the bottom of the window.
2.3.Course Summary block
The Course Summary block is located on the right side of your Moodle course page on a laptop or desktop, or on the bottom of the page if you are viewing the course from a smartphone. By Default it contains the name of the instructor and the email address for the course’s email list, however this information is loaded in to Moodle near the time of course registration so by the time the semester starts in some cases this information may be out of date.
You can edit the Course Summary block by visiting your course page, click the gear icon, then selecting Edit settings.
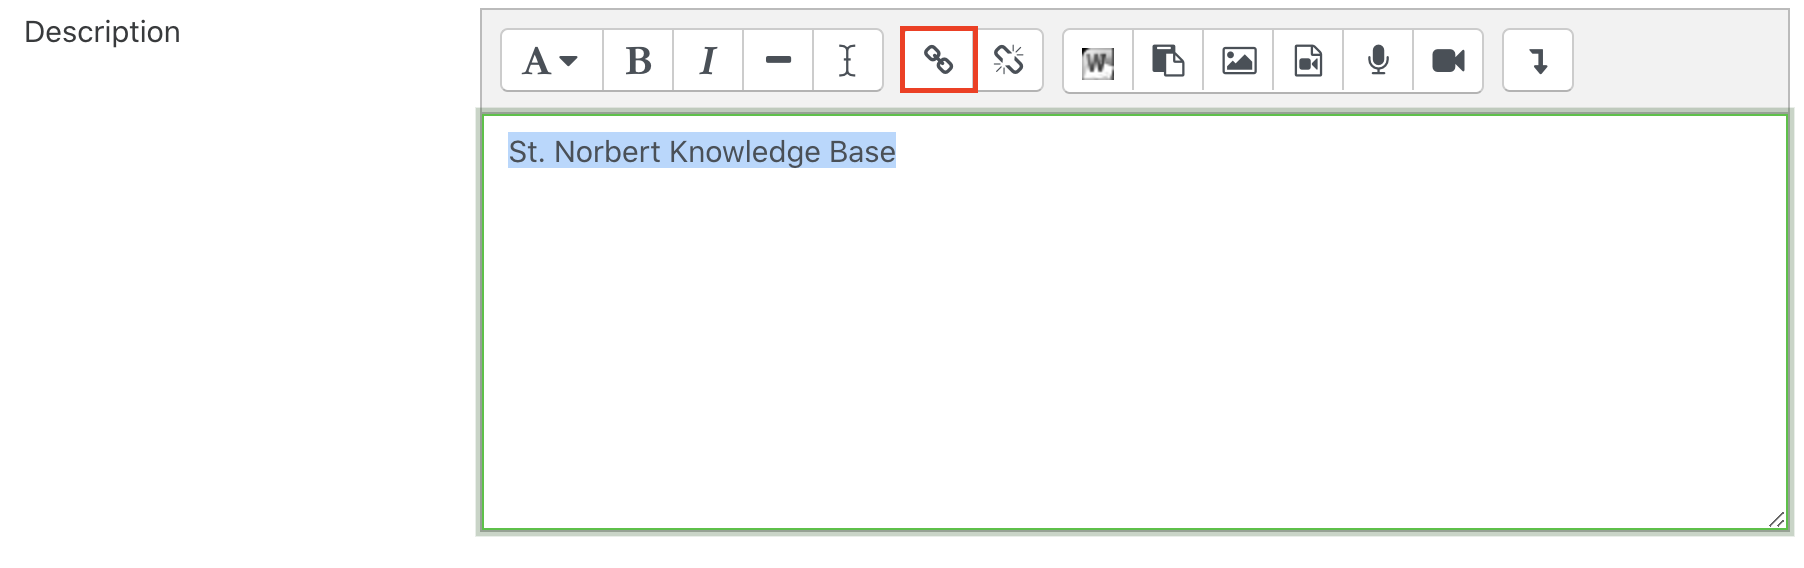
Next, under Description, edit the text in the Course summary field. Note that you can use the Create link ![]() tool to create and edit links. You can simply update the information in the Course Summary block, or add additional useful information. When you are finished, scroll to the bottom of the page and click Save and display.
tool to create and edit links. You can simply update the information in the Course Summary block, or add additional useful information. When you are finished, scroll to the bottom of the page and click Save and display.
2.4.Creating a Hyperlink to Link an External Website
In many Moodle activities’ description field there is an option to place a link to an external website. This can be useful if you’d like to share a resource with your students, but would like more attractive formatting. Google is more readable than https://google.com
In your new activity’s description field, or elsewhere in Moodle, you’ll see a link icon. Look for the chain link icon.
To make a link, highlight your text, then click the chain link icon.
After you click the chain link, you’ll enter the link of the site you’d like.
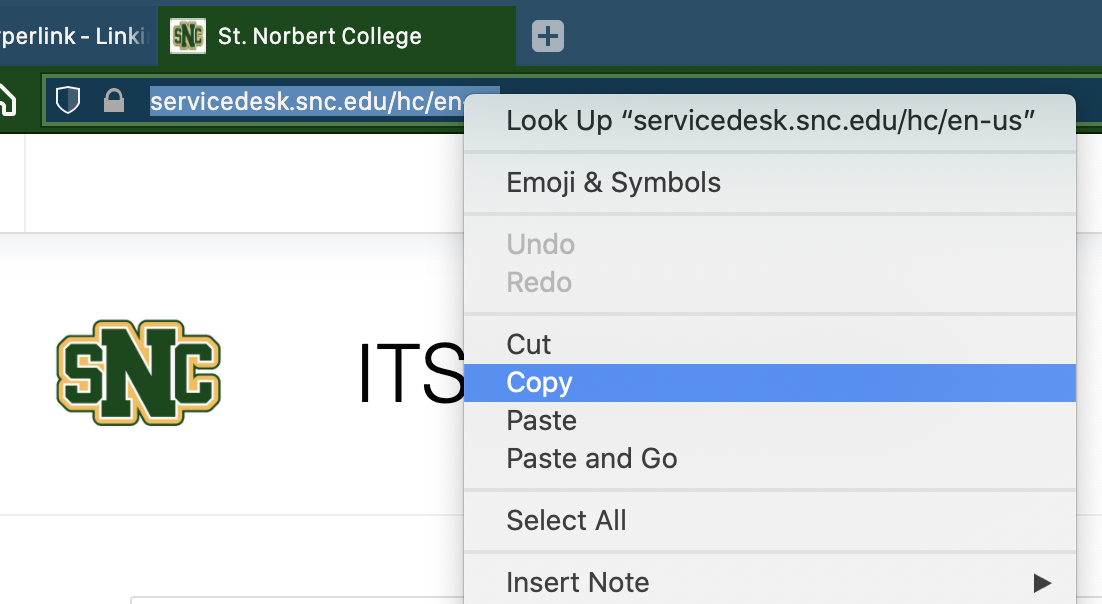
I think the easiest way to get the link of a site is by navigating to the site. Once you’ve navigated to the site, click on the address in the address bar to highlight the whole URL, then right click -> Copy (you can also use keyboard shortcuts. CMD-C on Mac, or CTRL-C on Windows).
Back in Moodle, paste the link you’ve copied. If you’d like the link to open in a new window, select that checkbox.
Once you’re ready to go, click “Create link”.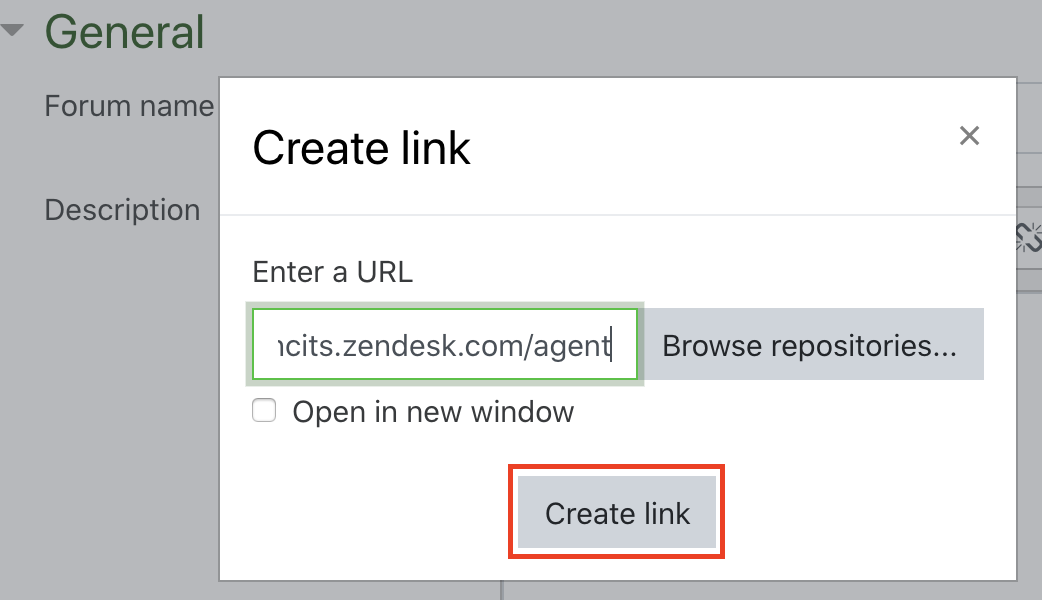
You’ll notice that the text you made into a link is now green.
You can continue the rest of your activity setup. There is no limit to the number of links you can place.
2.5.Migrating Content Between Courses
Use this article if you have a lot, or a little bit, of course content to move between courses.
In the course you’d like to move the content to, click on the settings gear, then “Import”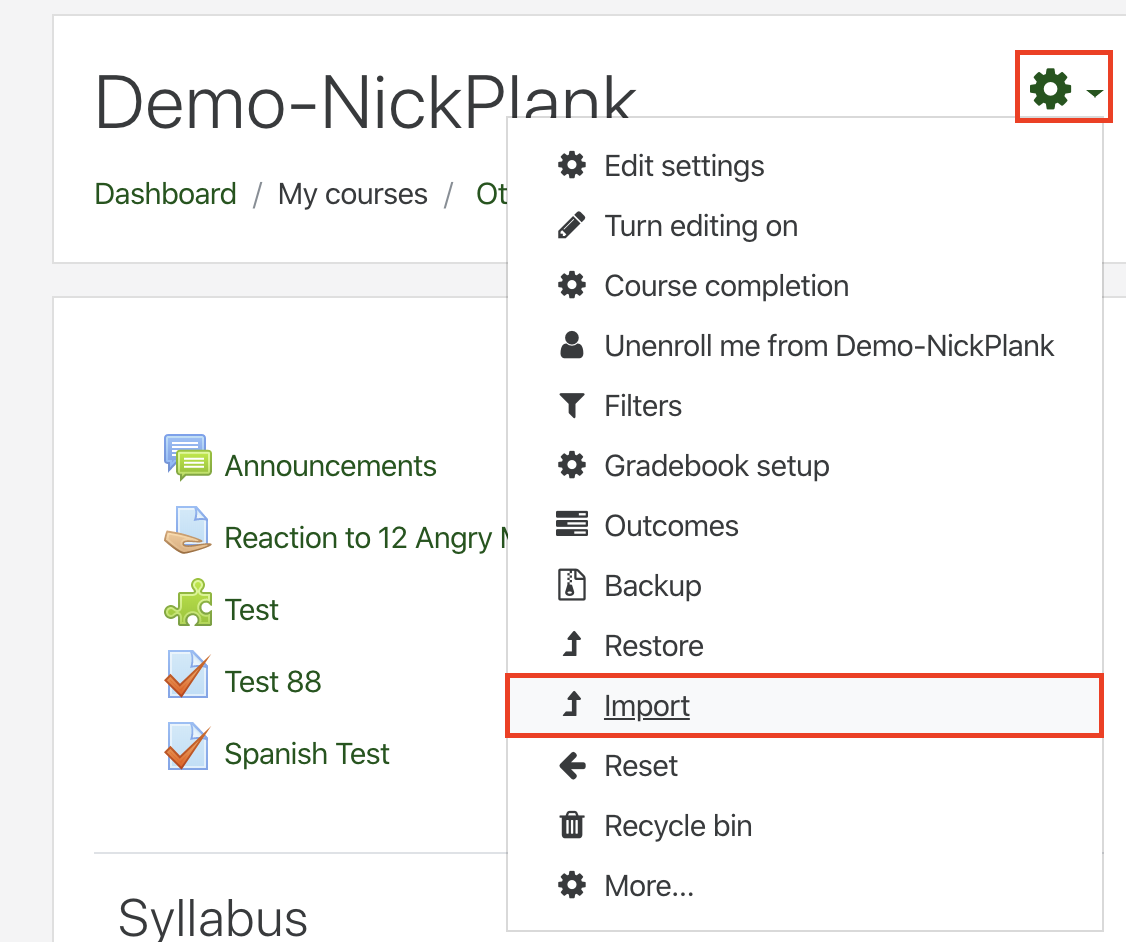
Near the bottom of the window (you may need to scroll down), click on the search box, and search for the class where your content is.
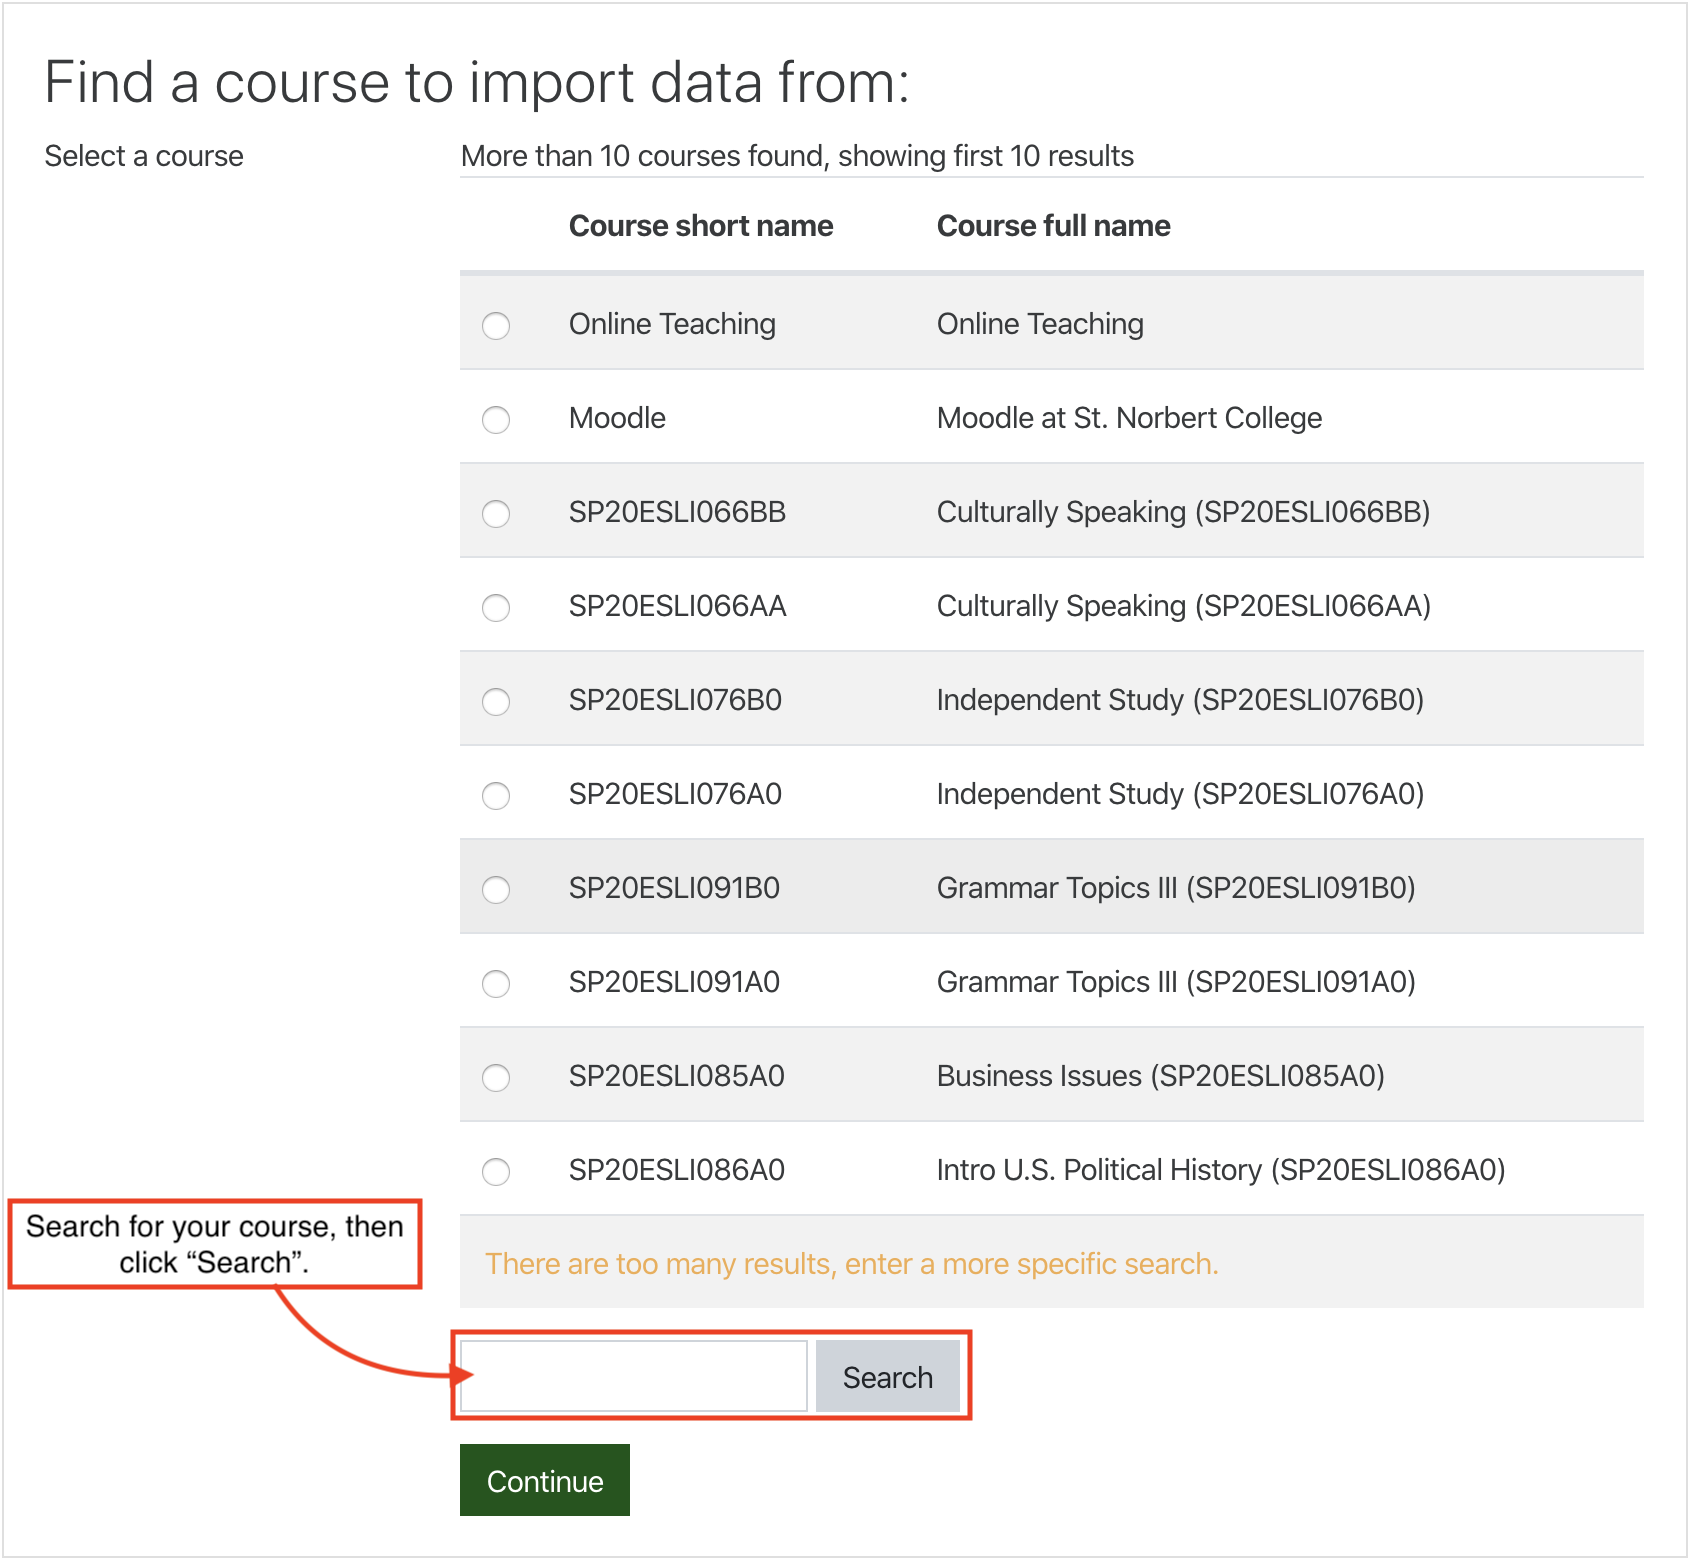
Select the course with the content that you’d like to migrate. Click “Continue” after you’ve selected that course.

Generally, you should keep all of the checkboxes checked in the next step. Click “Next”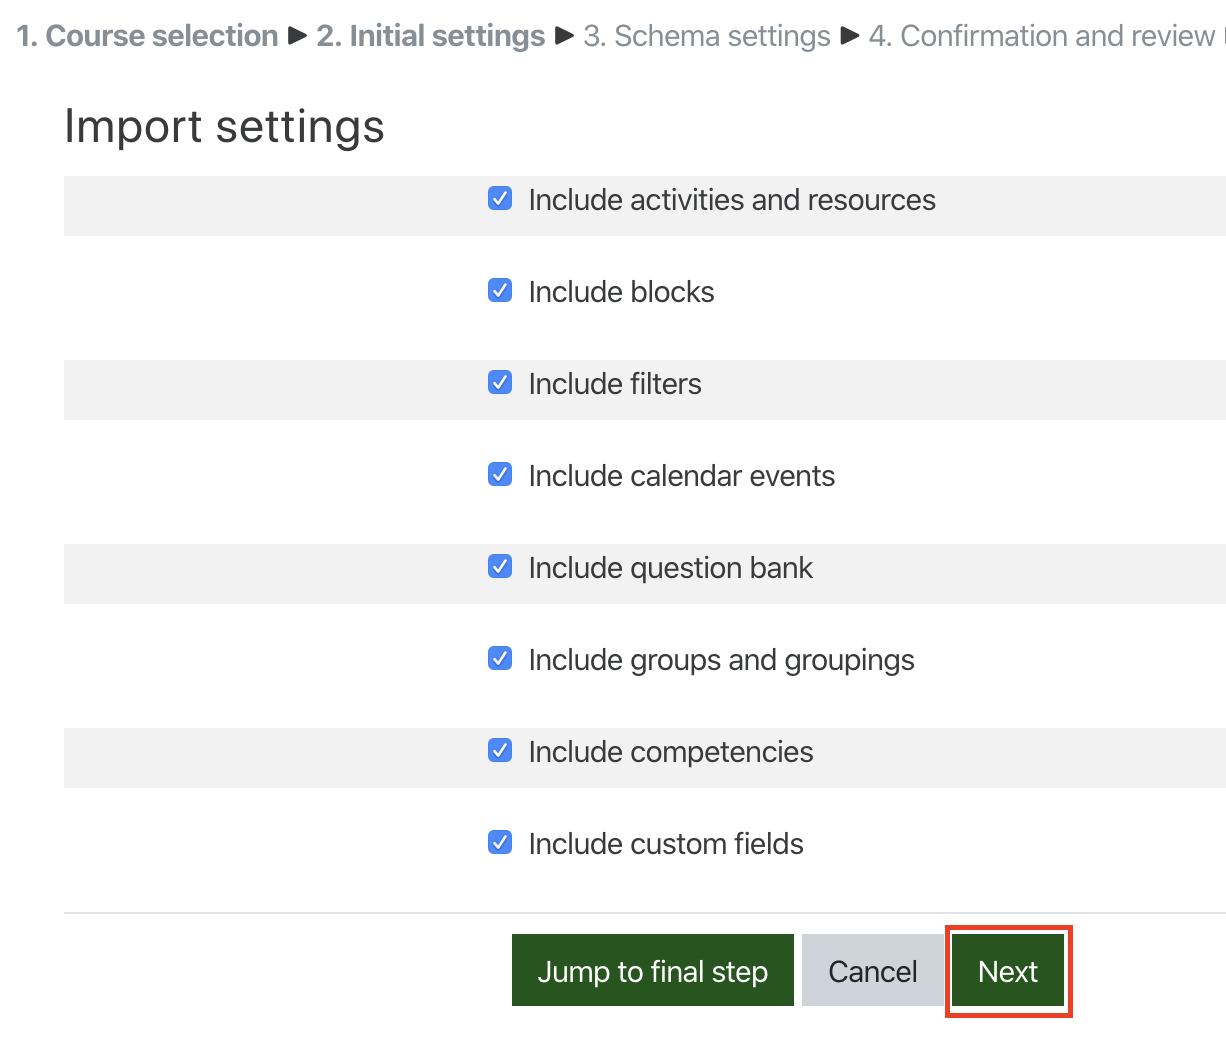
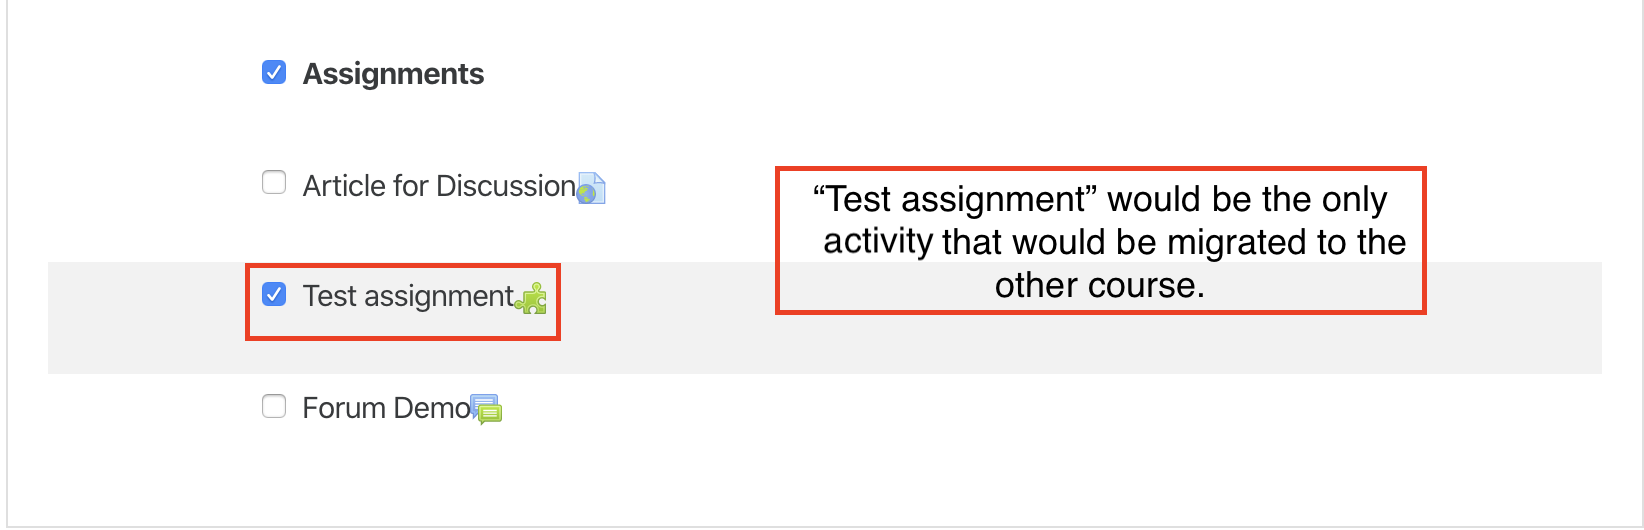
The next step is the most important. In the course outline, all activities and elements of the course are selected to be transferred by default. De-select any and all items you don’t want to migrate.

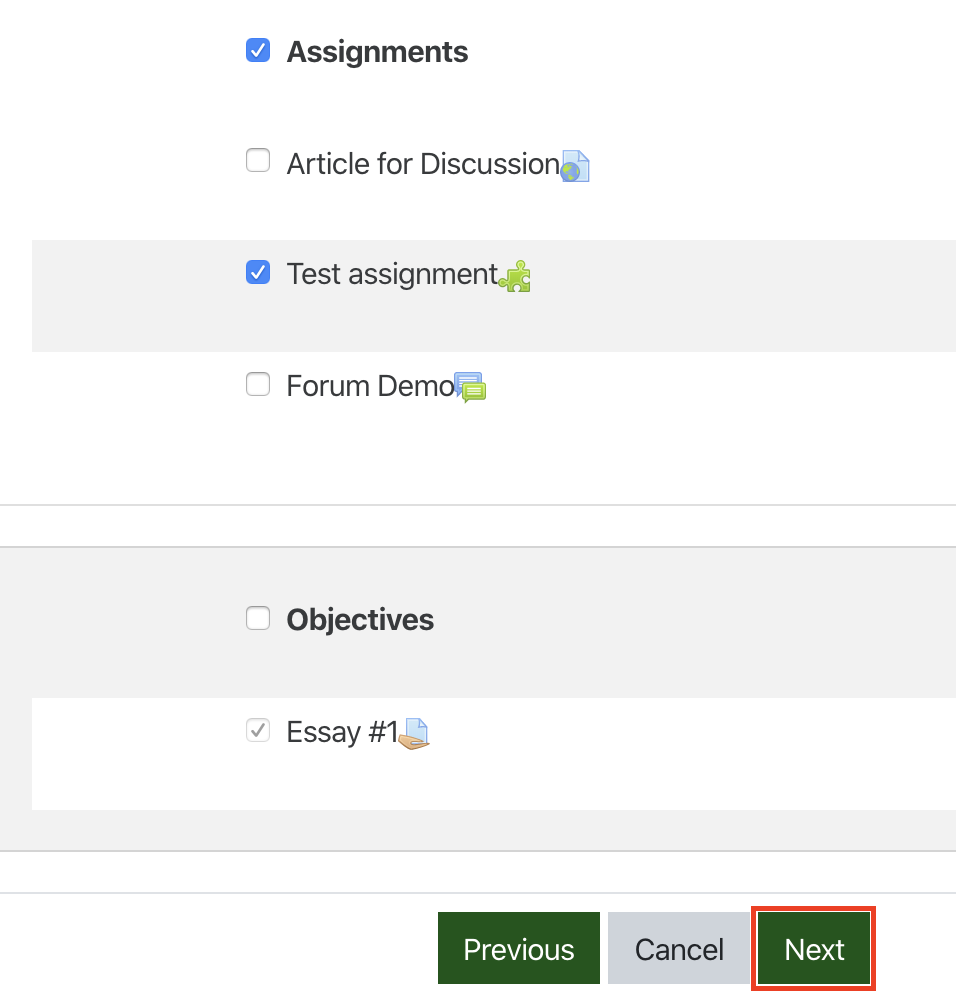
Once you’ve selected the items you’d like to migrate, click “Next”
The next screen will allow you to preview the changes you’re about to make. If everything looks good, click “Import”. If you need to change anything, click “Previous”.
A progress bar will appear to show you the status of the content you’re importing. Once it’s completed, click “Continue”. Now, you’re done, and that content will be in your course.
2.6.Embedding Content in an Activity Description
Any place in Moodle that allows you to put a description (Assignment descriptions, class descriptions, etc…) you can embed multiple forms of media for your students to consume. You can take your own video and audio recordings, as well as embed videos and images from other websites.
I’ll specifically show you how to embed a video (mine will be from YouTube) in an assignment.

Image icon: add an image from a different web site (red)
Video document icon: add a video or audio recording from a different web site (orange)
Microphone icon: Make an audio recording (Light green)
Camcorder icon: Make a video recording (Dark blue)
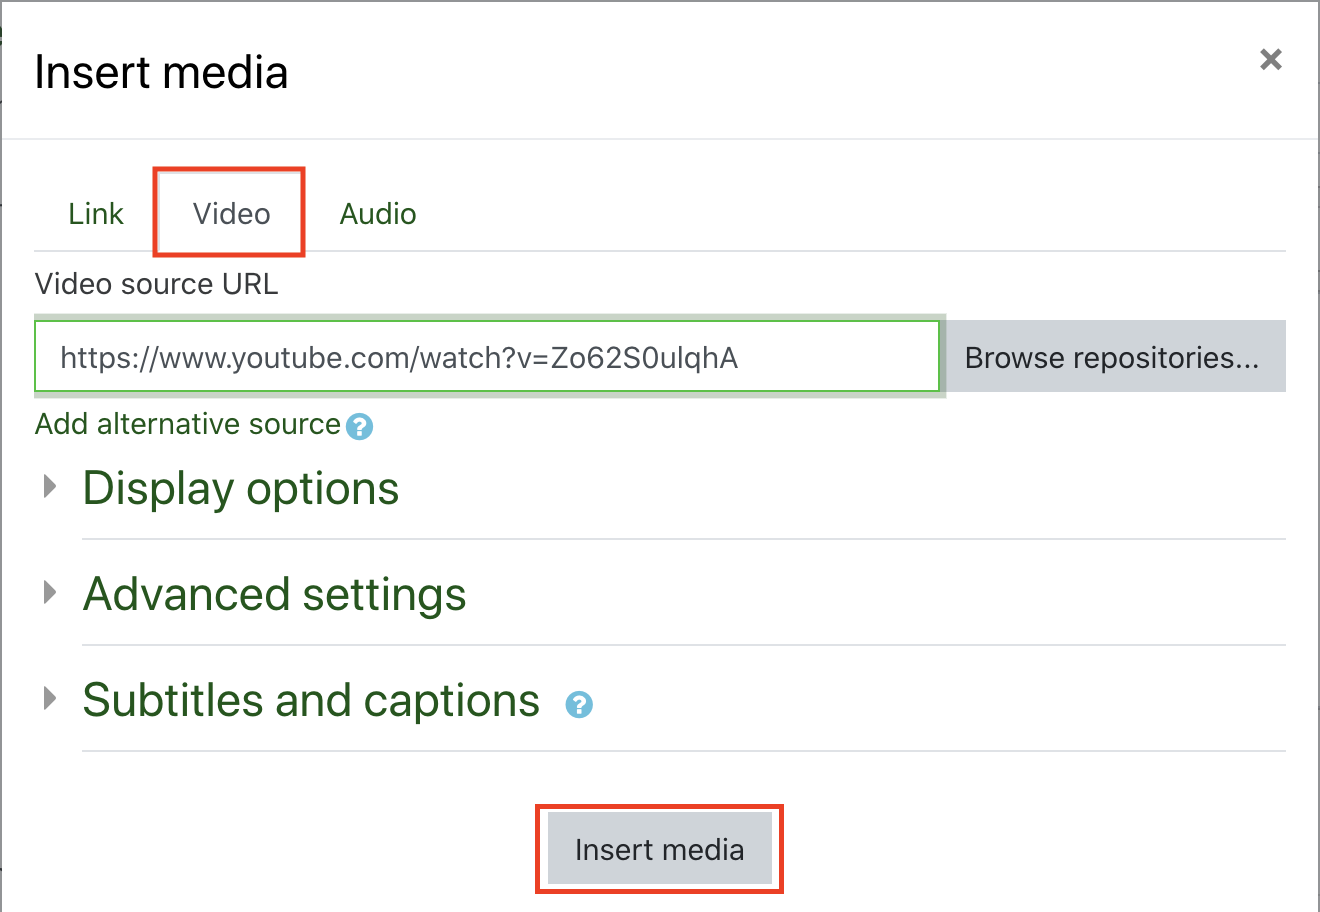
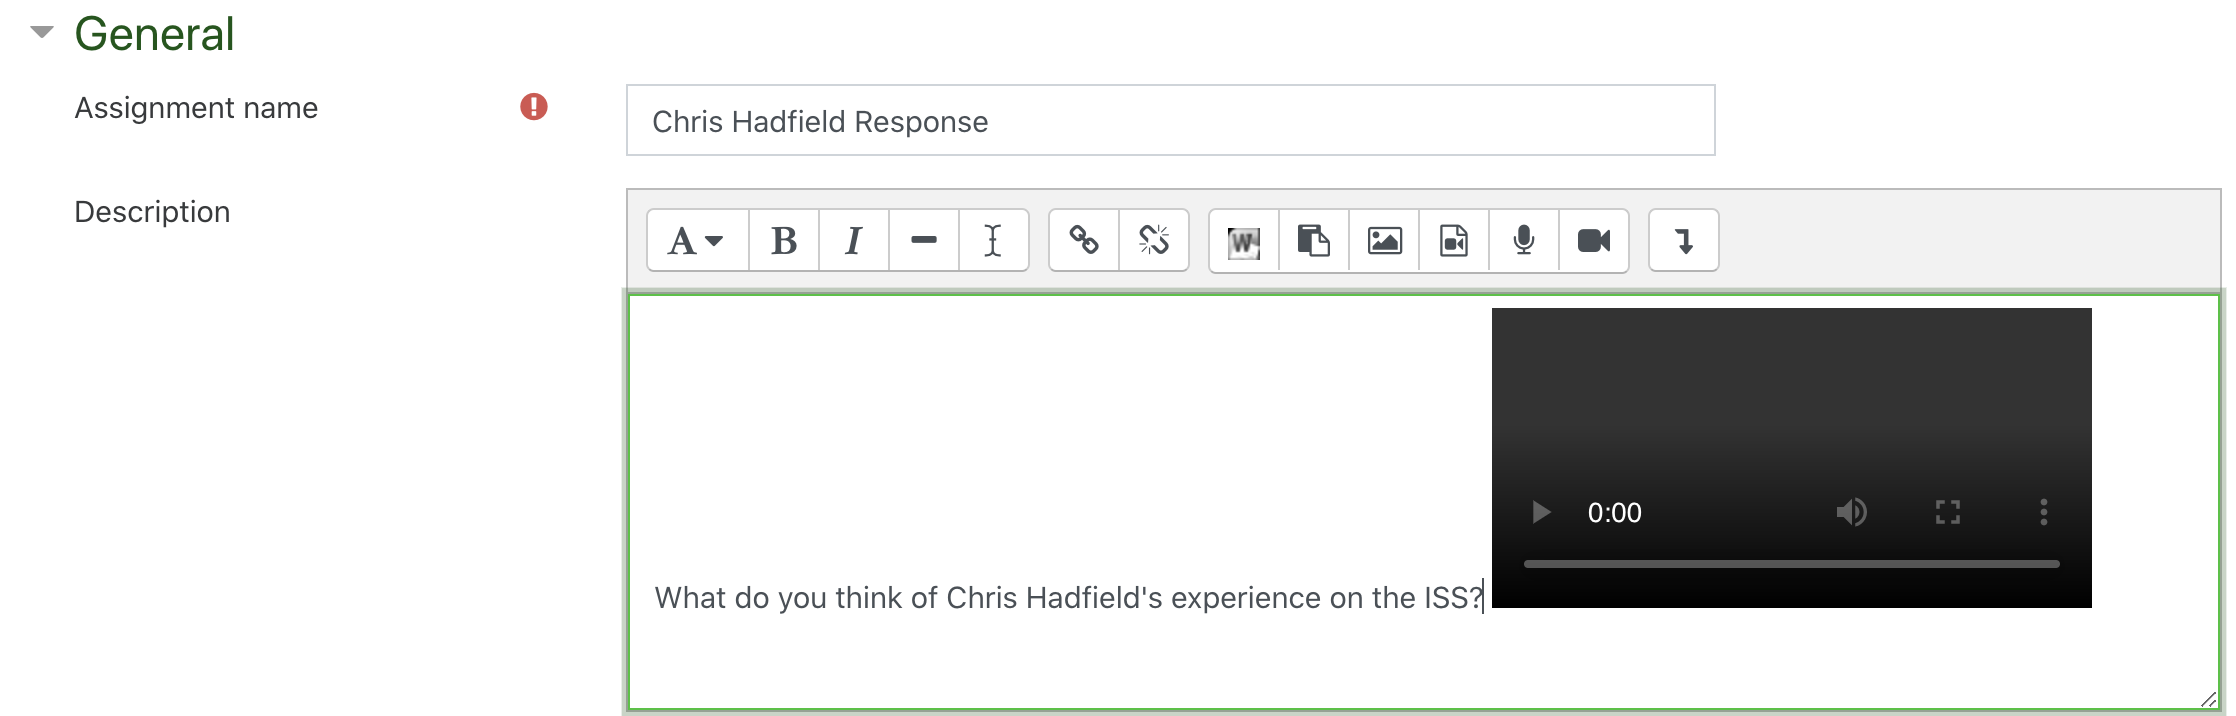
When adding a video, make sure you click on the “Video” tab.
Find the video you’d like to embed, and copy its URL. Paste that URL in the “Video source URL” field.
You can click through the other settings, but the defaults will allow the video to be played in window. The viewer will also be able to control the video, unless that option is disabled.
Once configured to your liking, click “Insert media”.
Don’t be alarmed when your embedded video looks like this. It is just a placeholder for the video content you’ve put there. It will actually be there after you publish the assignment.
Then, configure the rest of the assignment as you normally would.
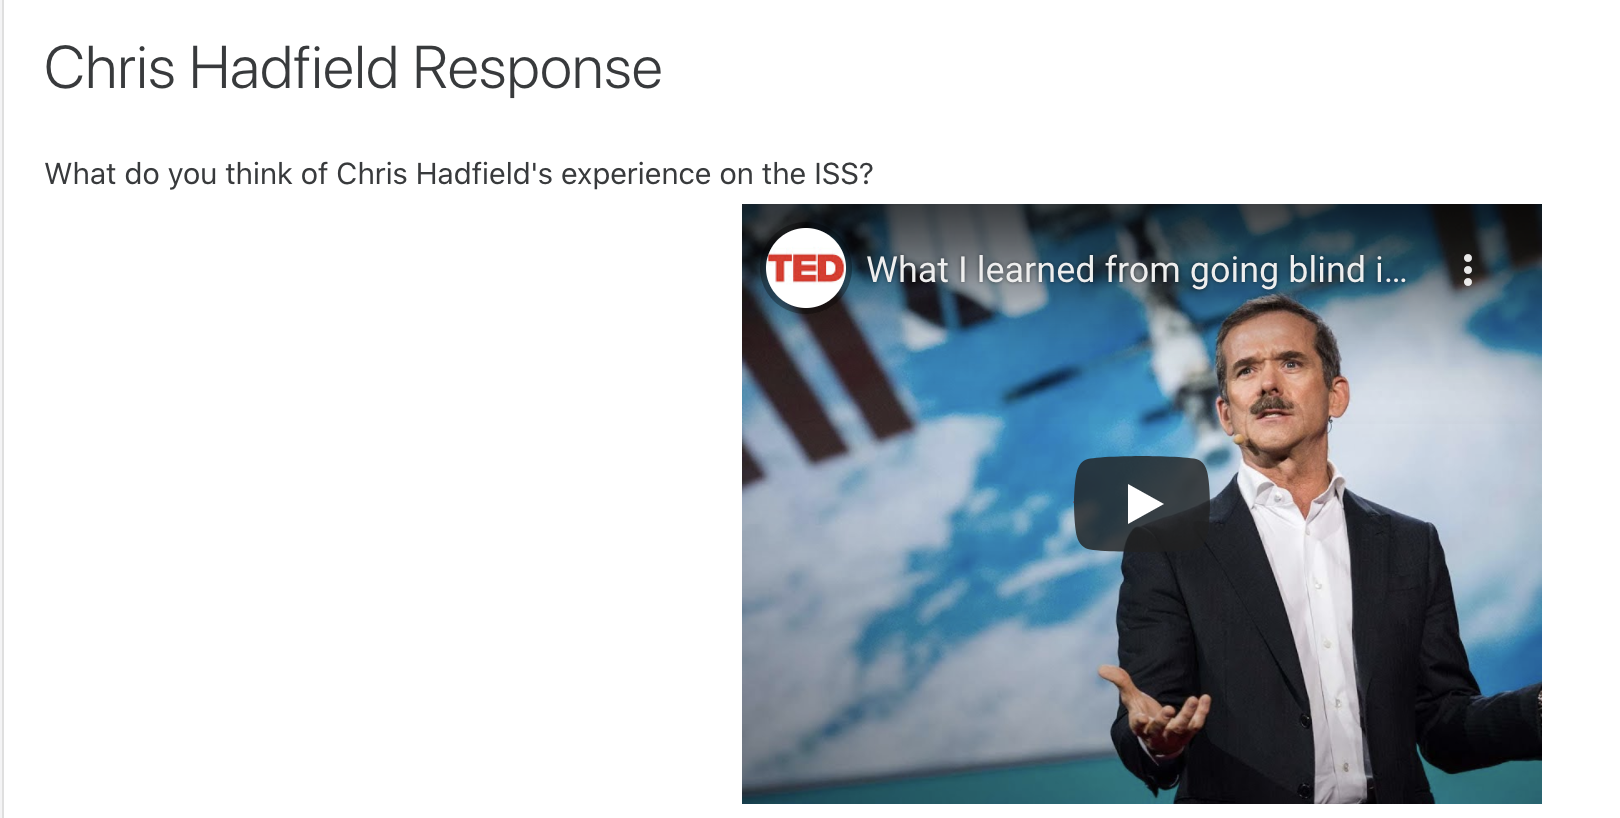
Once complete, the assignment and its description will look something like this.
2.7.Syllabus - Making a Word or Google Doc Into a PDF
Google Doc and Word documents can be reformatted easily, and in some cases unexpectedly.
To avoid those unexpected reformatting issues when presenting a document, like a Syllabus or a Resumé, you can make them into a PDF.
Google Docs
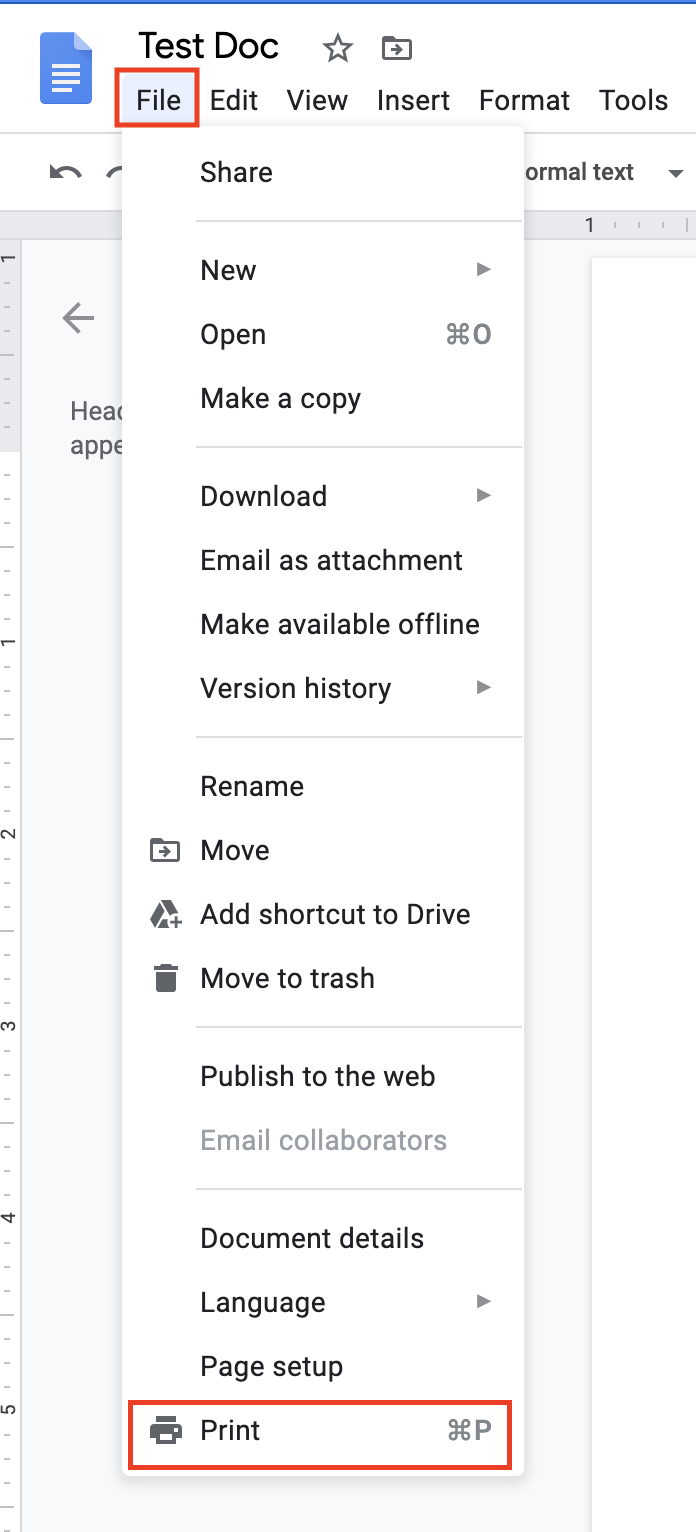
Under the document’s name, near the top left corner of the Google Docs window, click on the File menu -> “Print”.
In the print dialog, change the Printer dropdown to “Save as PDF”, then click “Save”
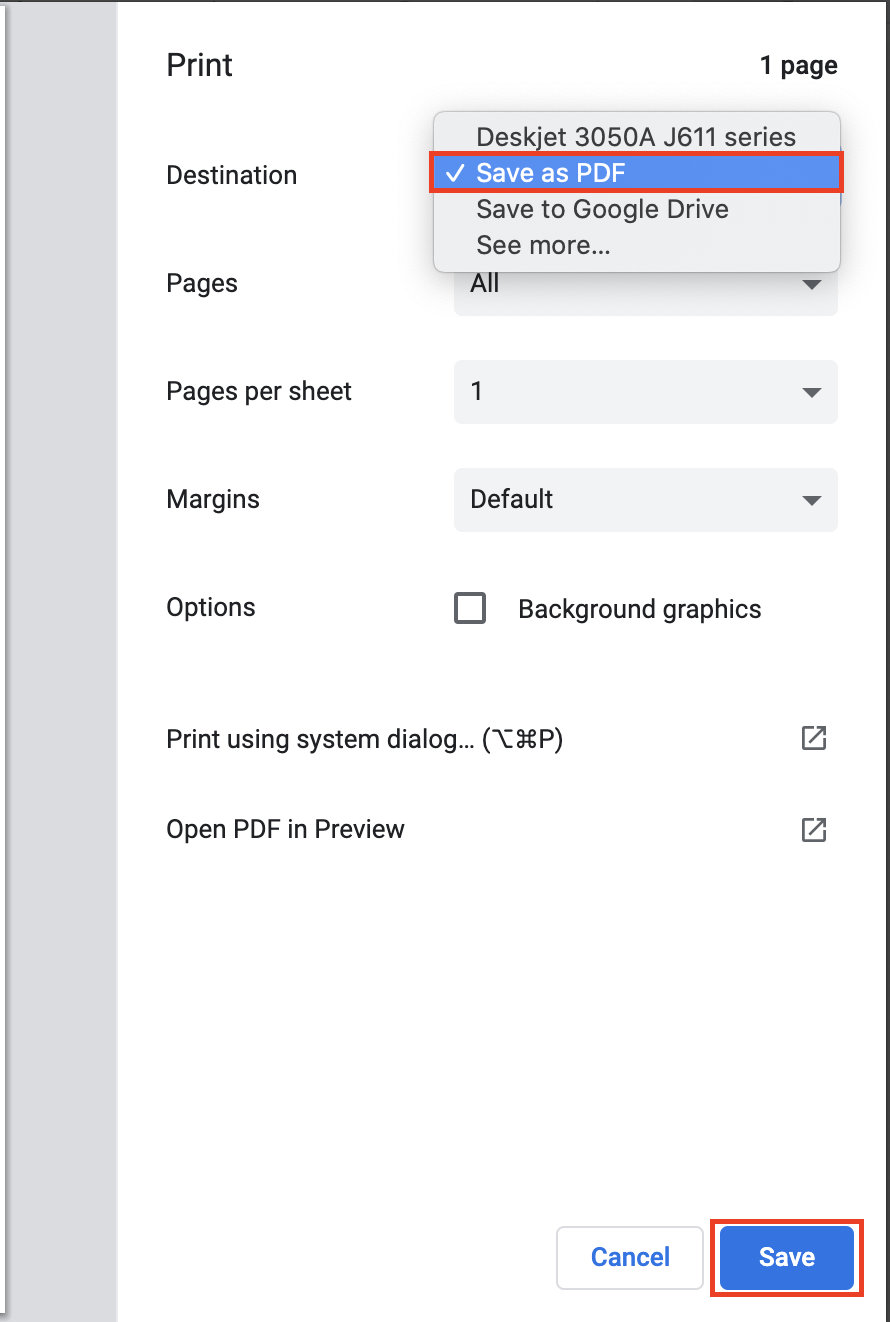
A dialog will pop up, asking you what you’d like to name the PDF, and where you’d like to save your PDF.
Microsoft Word (Windows)
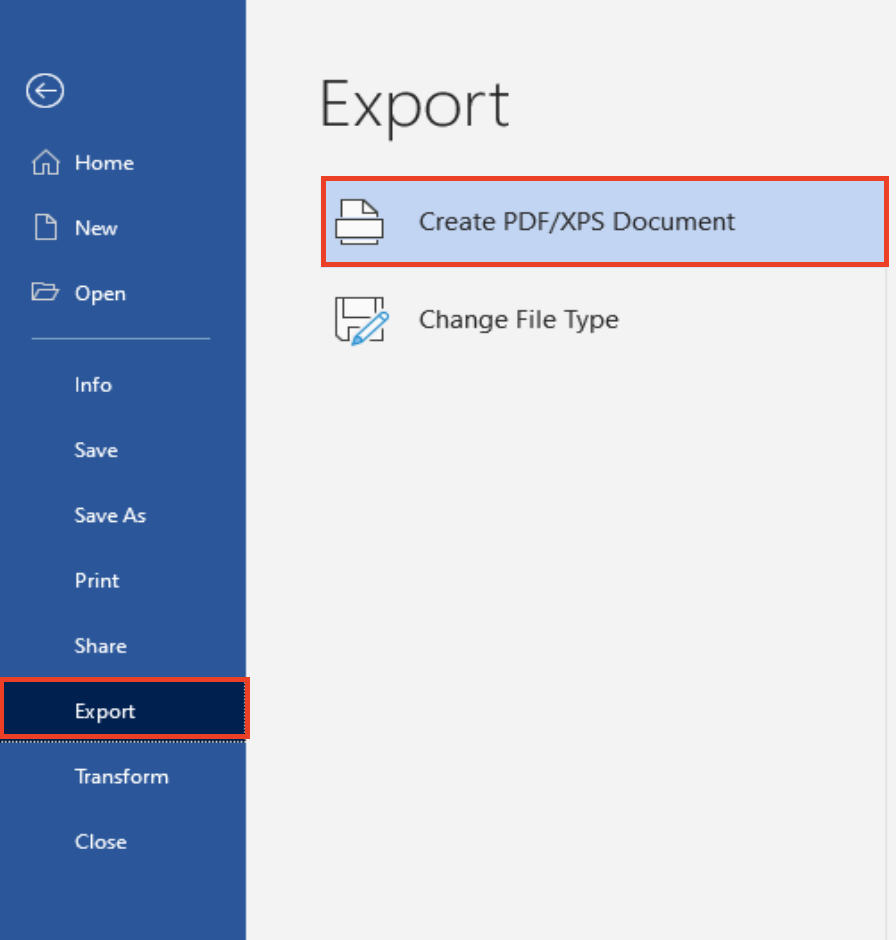
Click on the “File” menu.
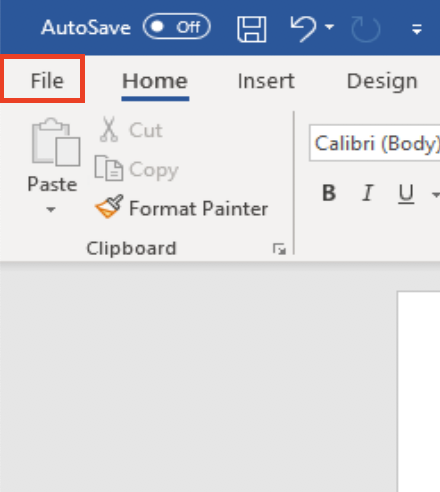
Click on “Export” -> “Create PDF/XPS Document”
In the dialog, name the PDF and select a location you’d like to place it.
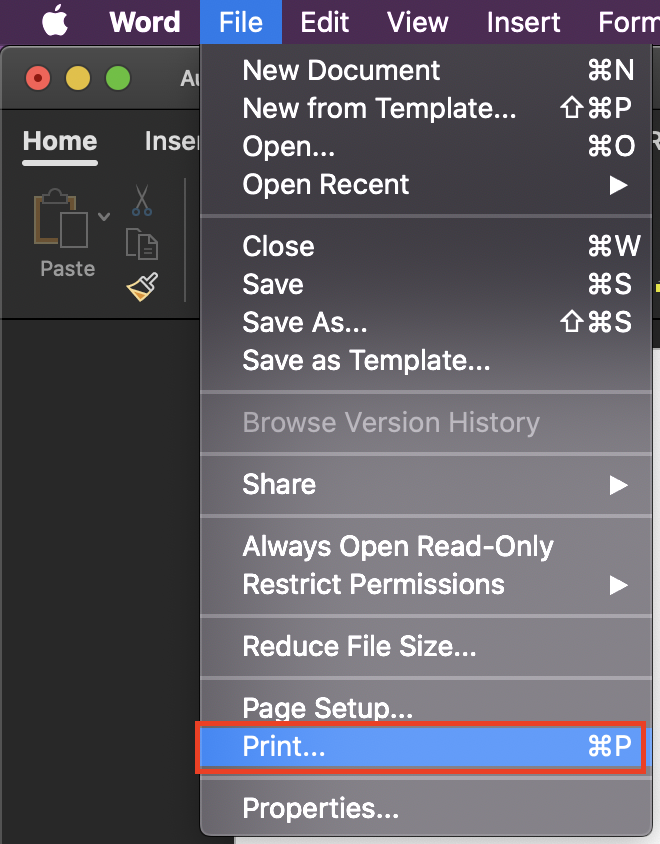
Microsoft Word (Mac)
Click on the “File” menu -> “Print”
In the bottom left corner of the print dialog, click on the “PDF” drop down.
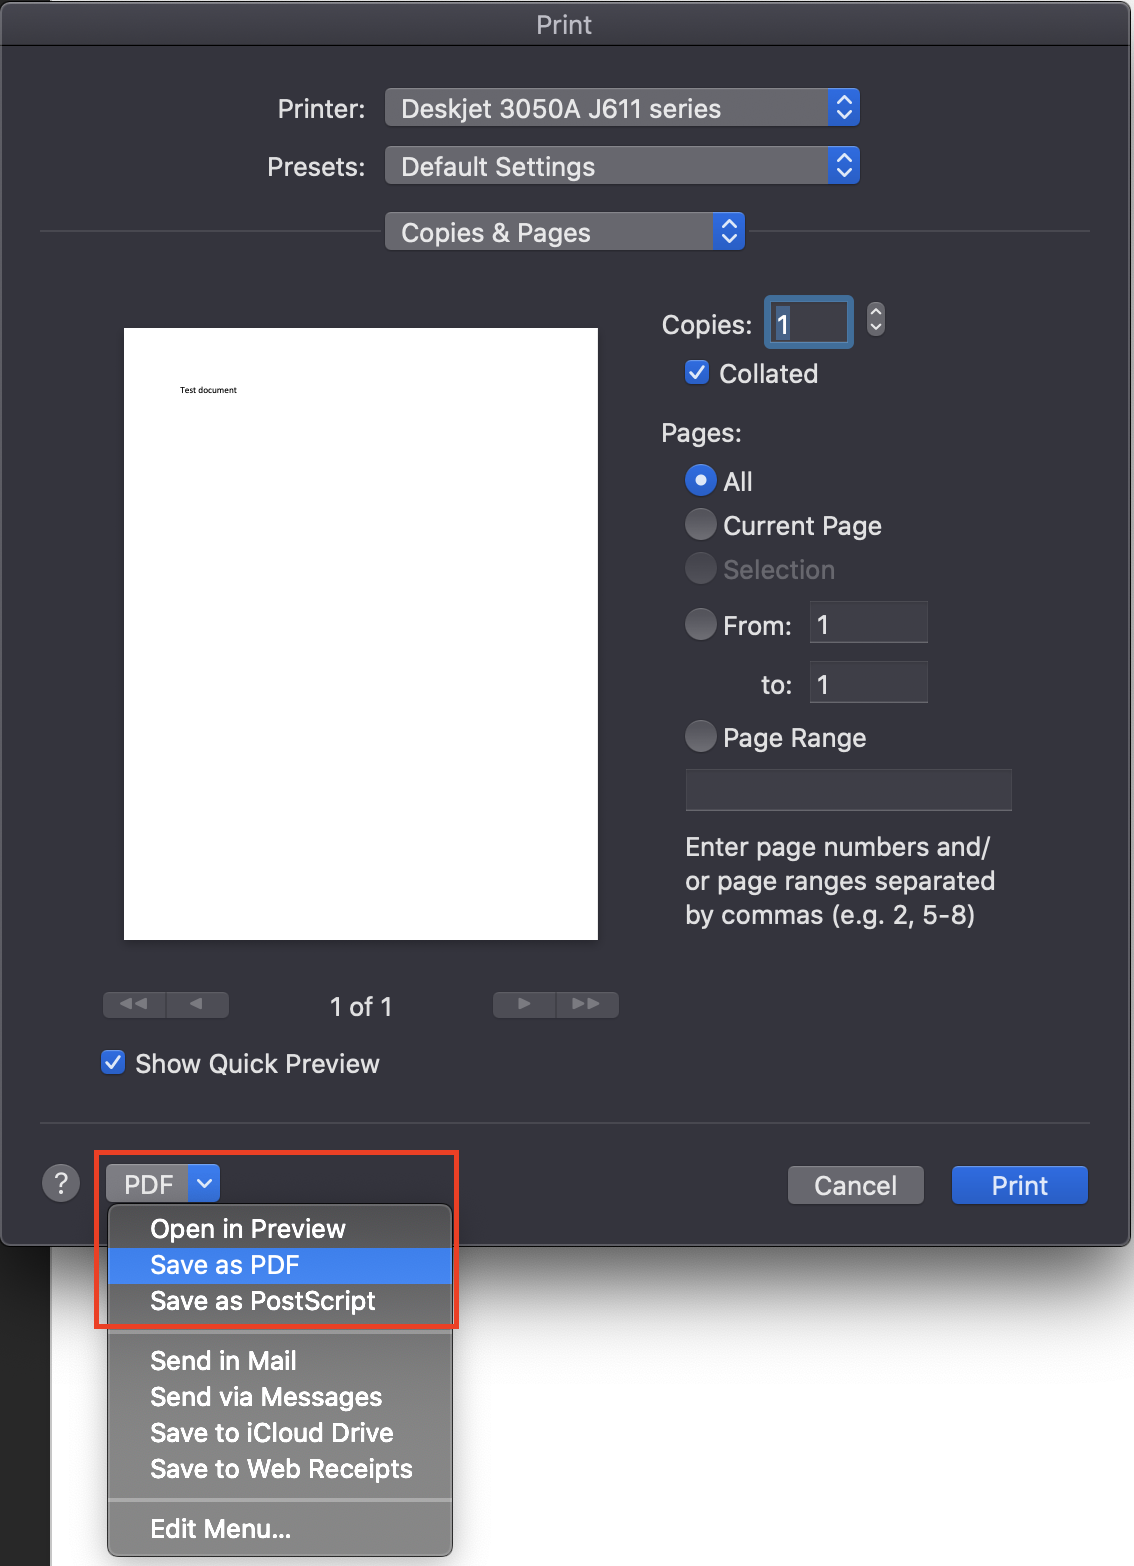
In the dialog, name the PDF and select a location you’d like to place it.
2.8.Create an Assignment Activity
In your Moodle course, click on “Turn editing on” in the top right corner.

Under the category in your course where you’d like the assignment to reside, click “Add an activity or resource”

Click on assignment.

On the next page, you’ll name your assignment and apply other settings.
Under the “Grade” section, you can configure a Maximum grade. This is how many points the assignment will be worth in your gradebook.
You can also change the Grading method. The grading method you choose will depend on the assignment, however most essays or responses will work best with “Simple direct grading”. Using the “Rubric” may be better suited for assignments with multiple parts.
You can also set due dates, choose how you want students to submit assignments, and change how feedback is given to work.
Once you’ve configured your settings, scroll to the bottom of the page and click “Save and display”.
2.9.Creating Google Assignments
In the top right corner of your course, click “Turn editing on”.

Click “Add an activity or resource” in the topic where you’d like the Google Assignment to reside.

In the activity chooser, select “Google Assignments”.

Name the activity.

Click the arrow next to “Grade”, then set a “Maximum grade” which is the point total for the assignment. If you have a grade category where you’d like the assignment’s grade to reside, change the “Grade category”.

Scroll down, and click “Save and display”.
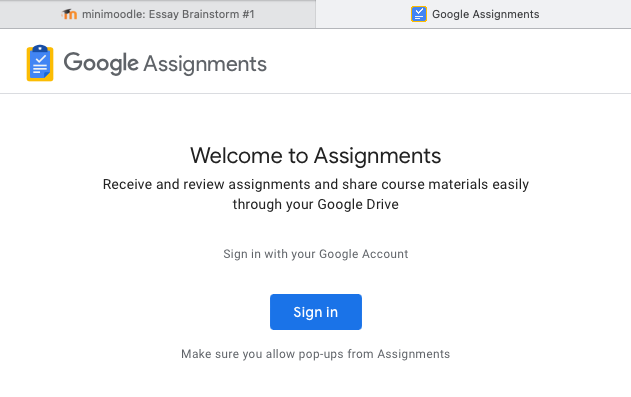
On the page that comes next, click “Open in new window”.

You might be asked to Sign in to Google. Go ahead and sign-in and link your account. You might need to do this for each course you add a Google Assignment activity.
2.10.Grading Assignments
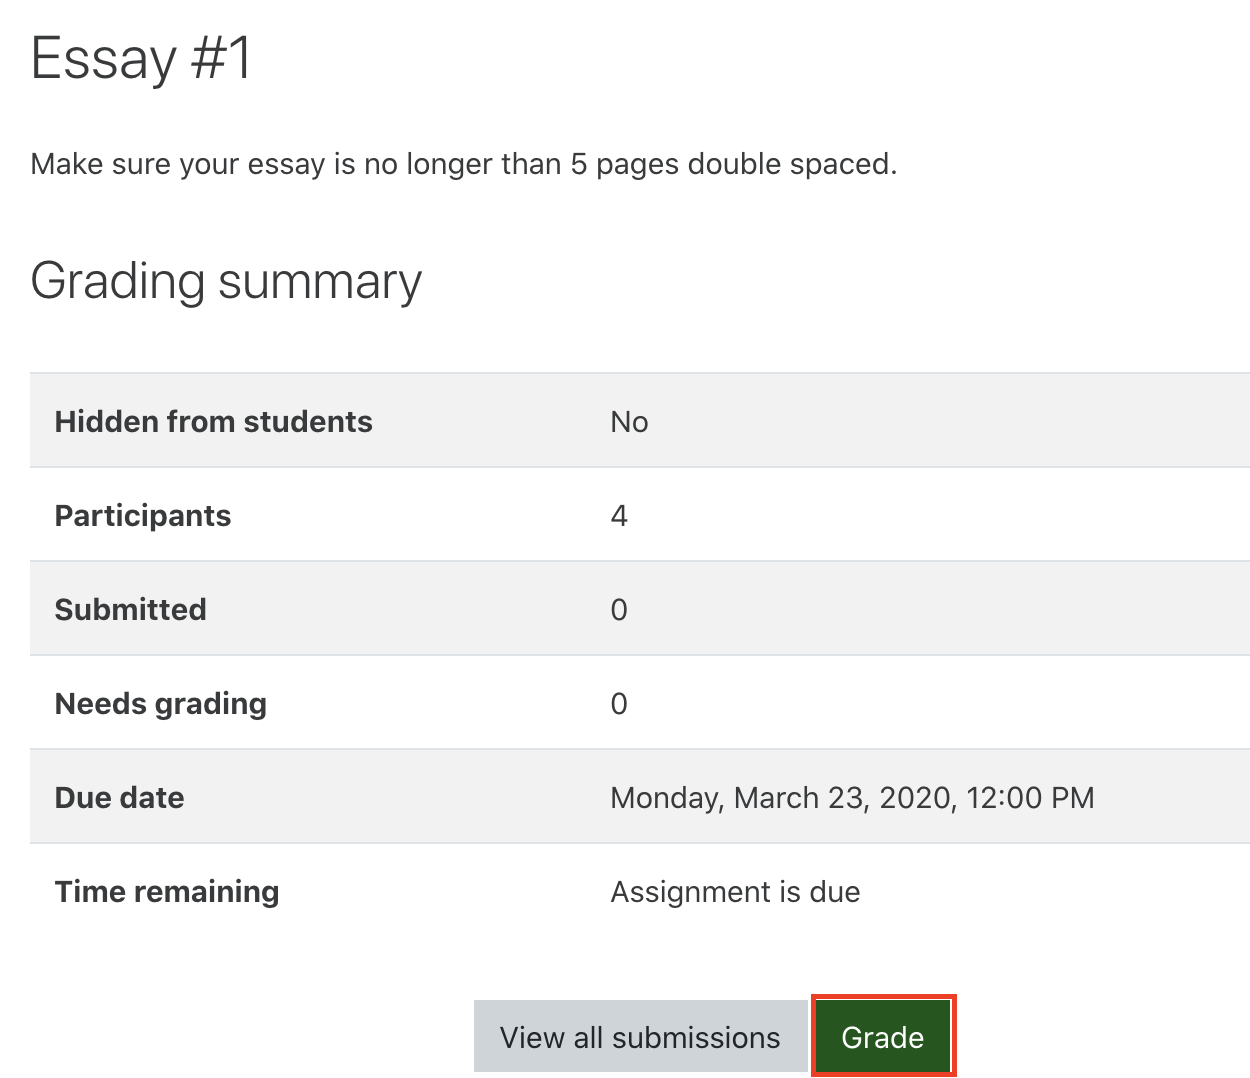
In your Moodle course, click on the assignment title.
Once students have submitted their assignments, or after the due date, click “Grade”.
You will see your student’s submission to grade. There are a number of tools you can use here to provide feedback to your students.

Gray box with lines through it: creates a text box where you can enter a comment(Magenta)
Yellow box: Change color of text box (Red)
Hand icon: allows you to scroll through the paper by clicking and dragging your mouse (Orange)
Arrow icon: allows you to move text boxes, drawing, or other markings (Light green)
Looped line: allows you to draw free-hand on the submission (Light blue)
Straight line: insert lines to underline or cross out text (Purple)
Box icon: Create a box on the document (Dark blue)
Circle icon: Create a circle on the document (Gray)
Highlighter icon: Highlight a part of the page to bring attention. Use in conjunction with the box and circle icon tools. (Dark green)
Colored tear-drop: Change the color of the shapes you draw, and your highlight color. (Black)
Stamp and “X” icon: insert stamps into the submission using these two icons. Navigate to the area of the submission in which you would like to place the stamp them click your mouse to insert it. (Yellow and dark orange)
While marking up the assignment, make sure to enter a grade, too. 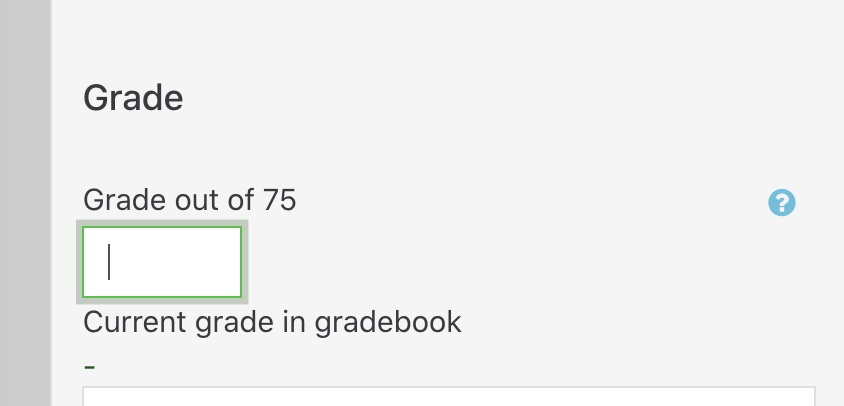
Before you proceed to the next student’s assignment, you may want to uncheck “Notify students”. If left checked, the student will be notified once you click “Save and show next”.

To proceed to the next student, click “Save and show next”.
2.11.Create, Reply to, and Grade Forums
In your course, click on “Turn editing on” in the top right corner.

In the section where you’d like the forum to reside, click “Add an activity or resource”

Click on “Forum” in the activity chooser.

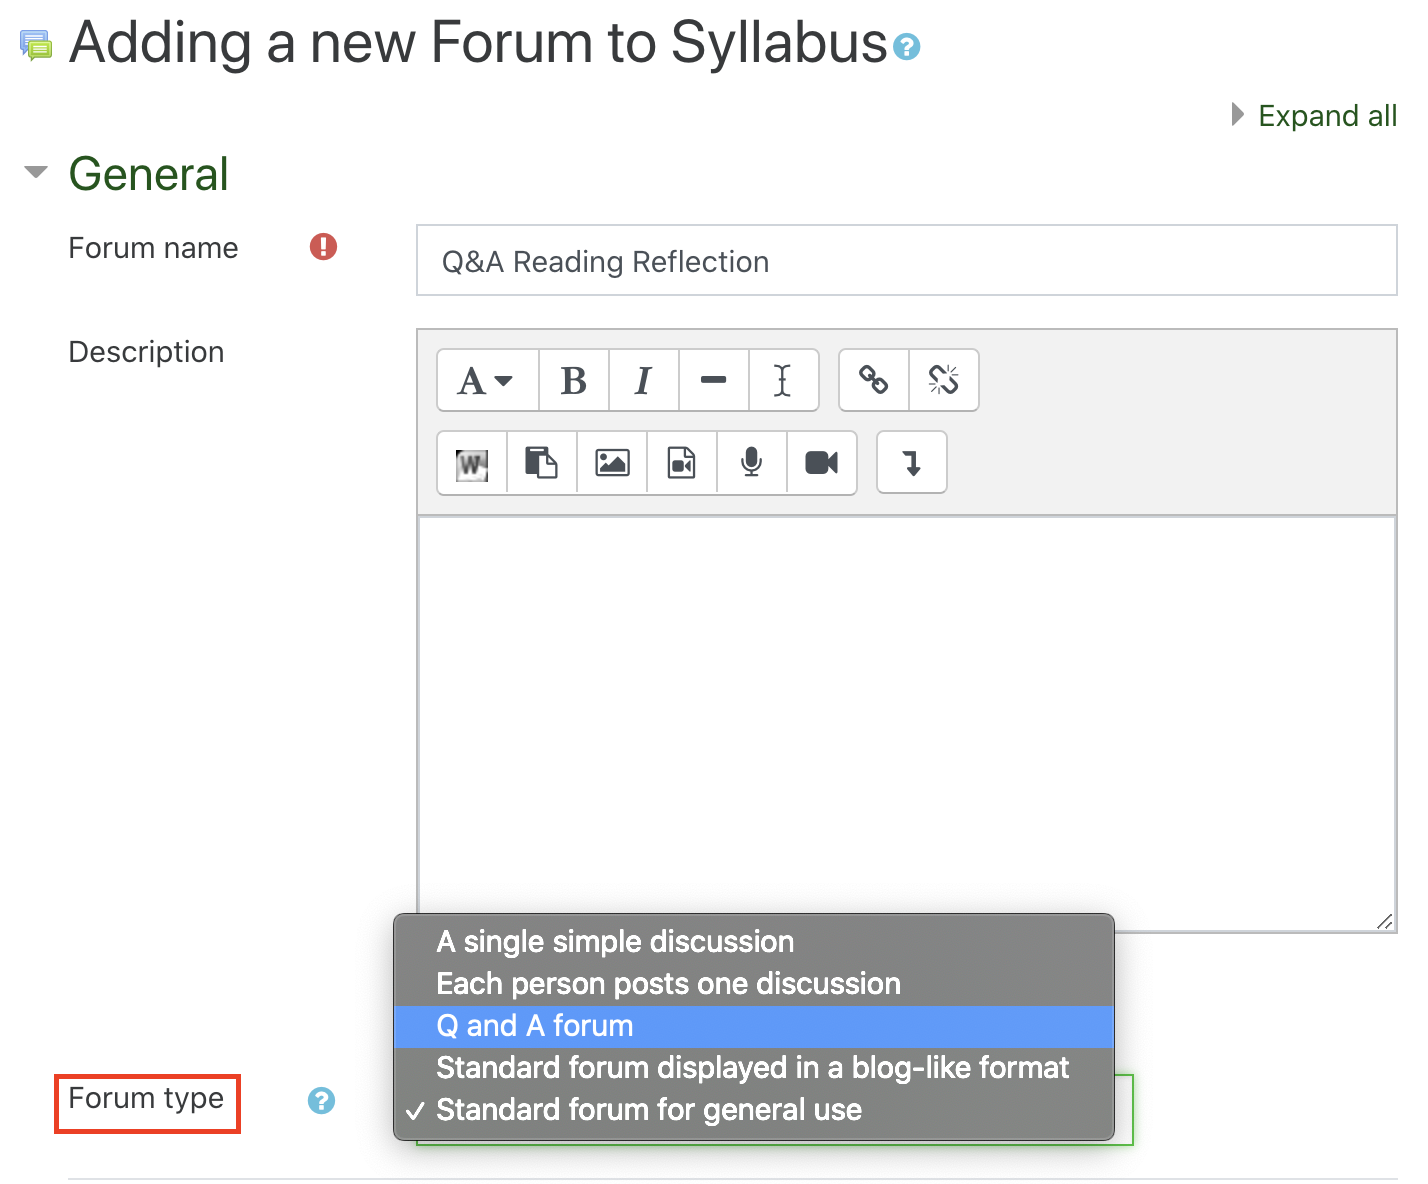
Name your forum, then select the “Forum type”
There are 5 different forum types to choose from. Each have a different functionality.
A single simple discussion – A discussion topic that everyone can reply to. Useful for making informational posts to the class. Even people can reply to this forum, there generally isn’t an expectation that people will reply to it.
Each person posts one discussion – Students post a discussion topic. This can be useful for class led discussion. The teacher would more than likely write a prompt like “Please post something you found interesting in the reading.” Students would follow up by posting a topic they found interesting, and other students in the course would interact with that discussion.
Q and A forum – Students reply to the forum posted by the teacher. They cannot see other student’s replies until they have submitted a reply themselves. This is probably the best forum choice to use when you’d like to grade participation or an answer.
Standard forum displayed in a blog-like format and Standard forum for general use are functionally very similar. They both allow students to create discussions, and reply to other discussions that students have created.
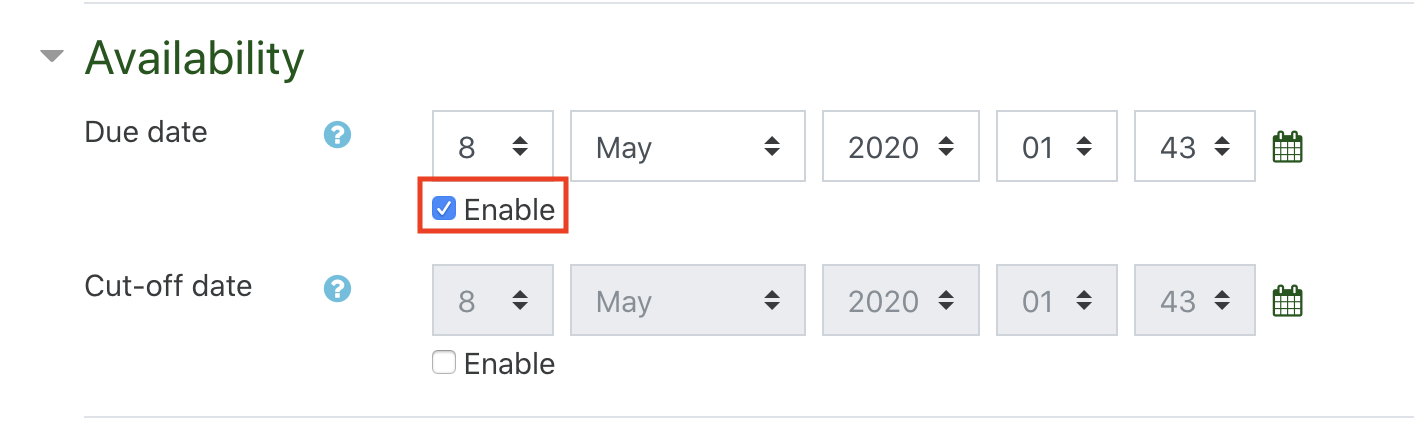
After you’ve decided which forum type is your favorite, you can change other settings of the forum, like “Availability”. You can leave a forum open the duration of the course, or set it to be open for a set period of time. If you do enable a due date, we’d recommend not enabling a “Cut-off date”. When you assess the student’s post, you will see when the student completed their post and it will also tell you if the submission was late.
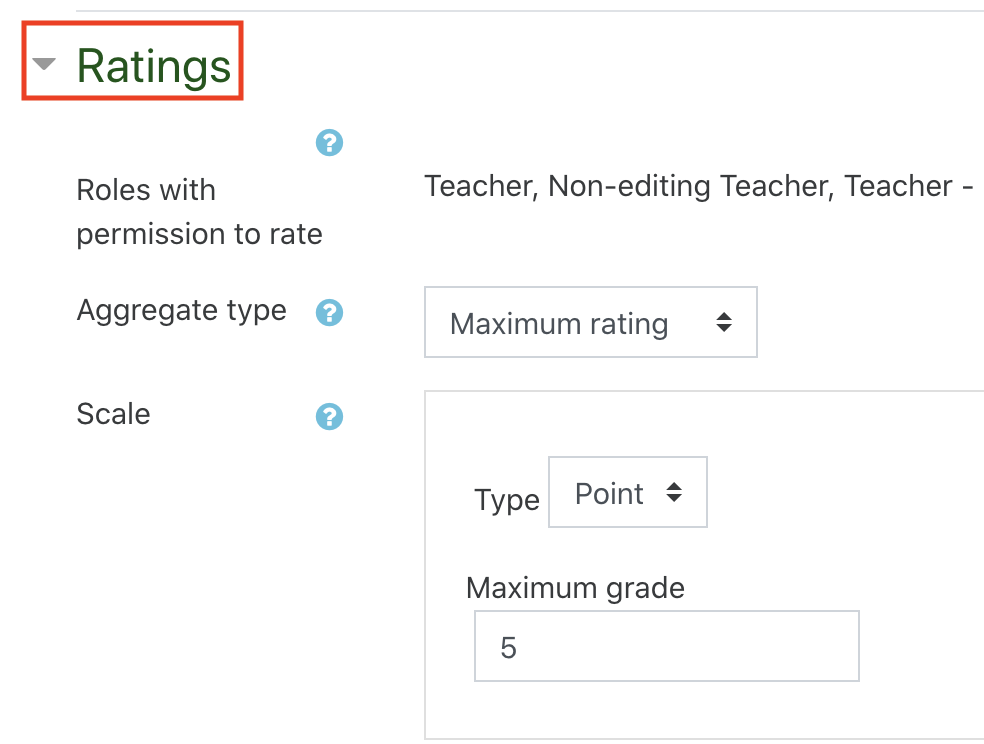
To add a grade to the forum, scroll to the “Ratings”section. Expand “Ratings”, then change the “Aggregate type” to “Maximum rating”. Enter how many points this forum is worth.
Then, scroll to the bottom of the page, and click “Save and display”.
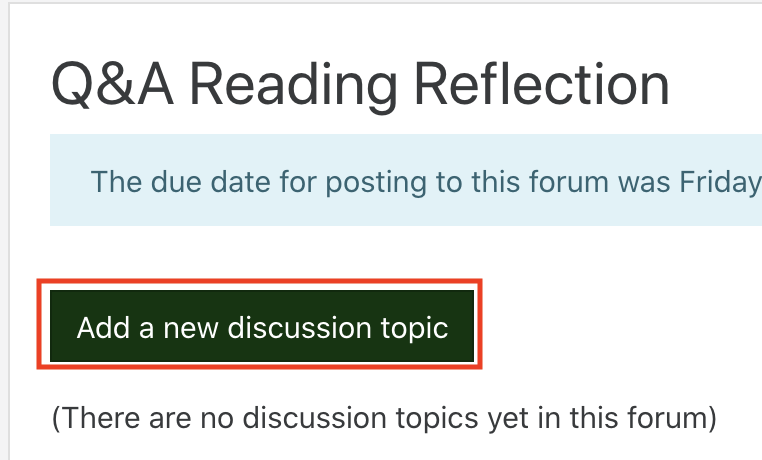
Click “Add a new discussion topic”
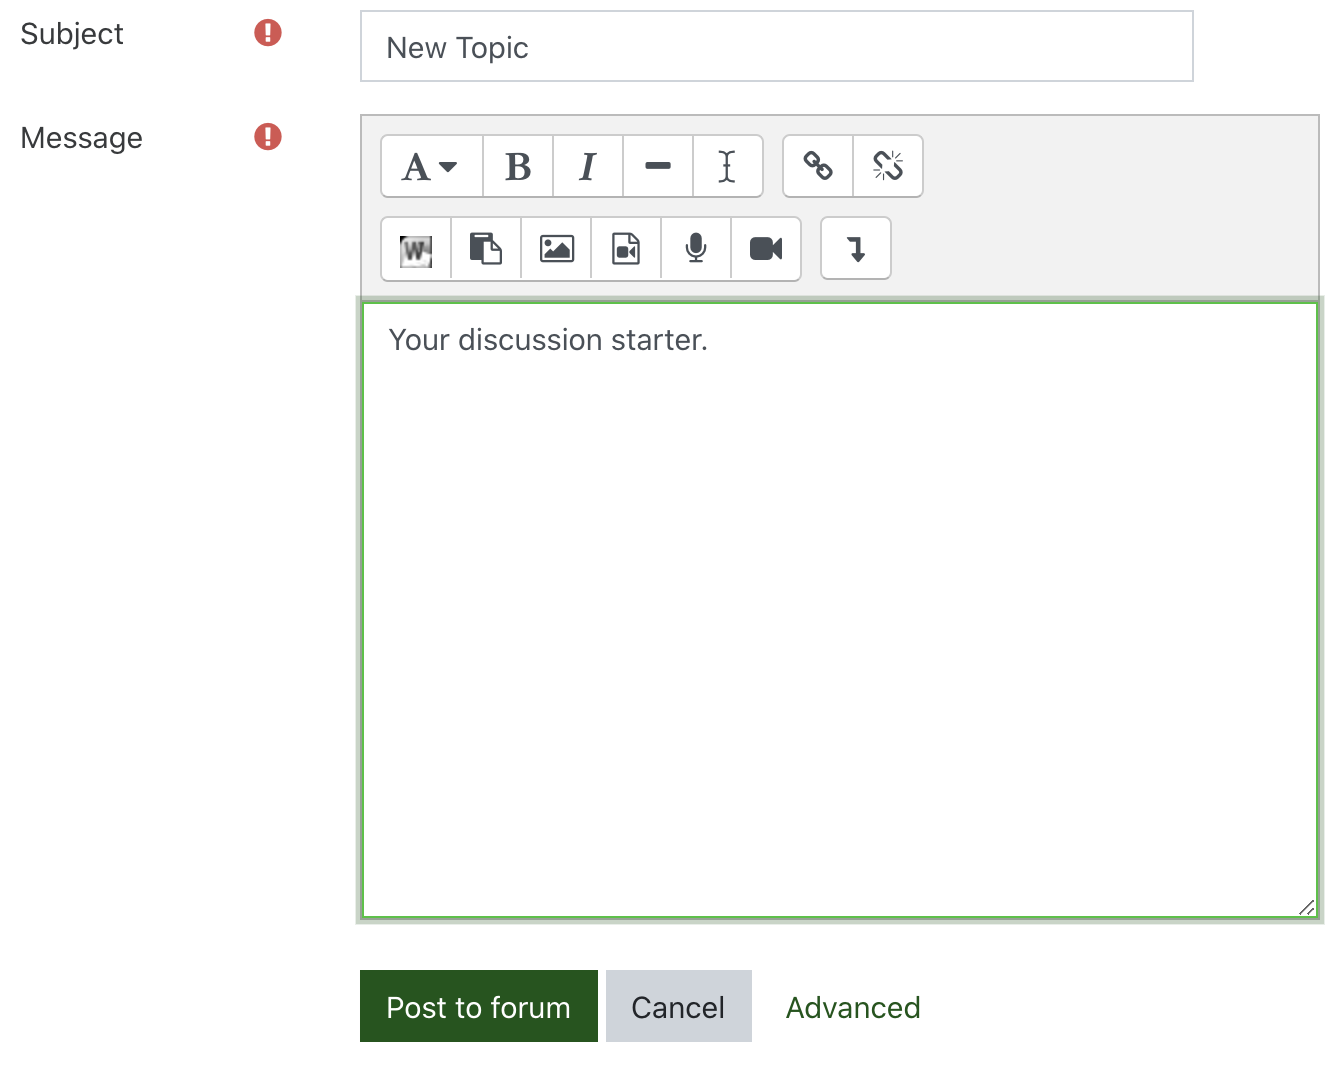
Add the subject, then enter the prompt you’d like to start your conversation with. Once done, click “Post to forum”.
Grading Student Forum Posts
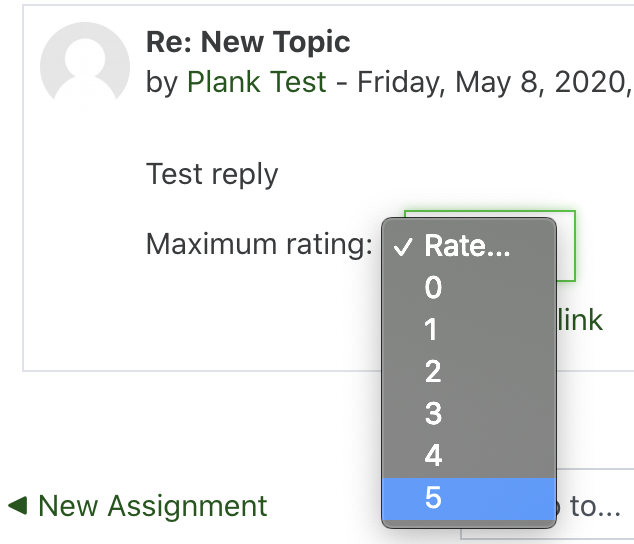
Navigate to the forum post reply of your student.
After you made your assessment of the student’s reply, you can rate it. The number of points you see directly correlates to the number you put in the “Maximum value” field when you were in the “Rating” section of the forum setup.
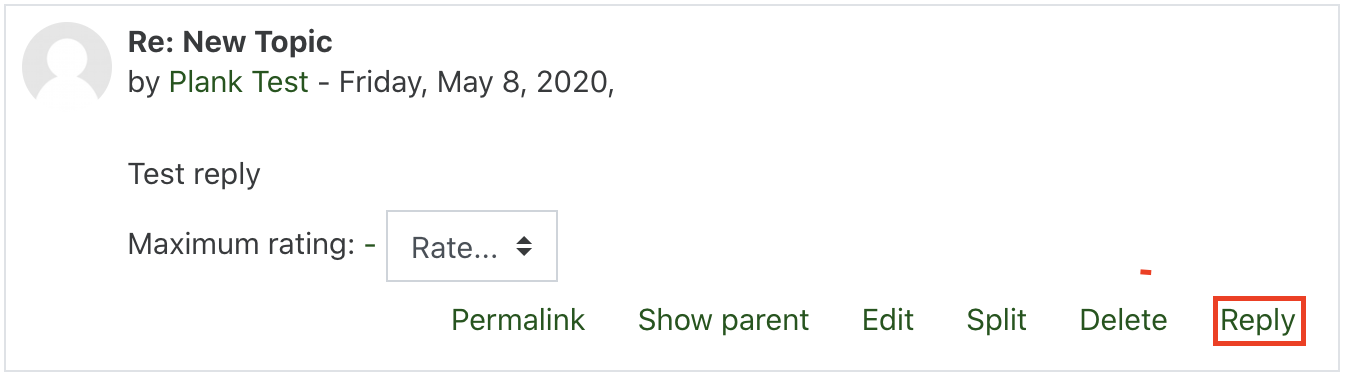
If you’d like to reply to your student’s post, you can easily do that here. Click the green “Reply” button to send a response to the student.
2.12.Create Test Questions and Set Up Quizzes
2.13.How to Use Respondus with Moodle Quizzes
These instructions are intended for use by instructors for setting up LockDown Browser in a Moodle course. If you are a student looking for instructions on how to use or install LockDown Browser, check out our article on How to use Respondus LockDown Browser to take a quiz.
Enabling Respondus LockDown Browser in your course
You must first add the Respondus LockDown Browser block to your course and tell Respondus, which quizzes should require the LockDown browser.
To get started, Turn Editing on in your Course
On the left side of the page, in the navigation drawer, click Add a block
Choose Respondus LockDown Browser from the list
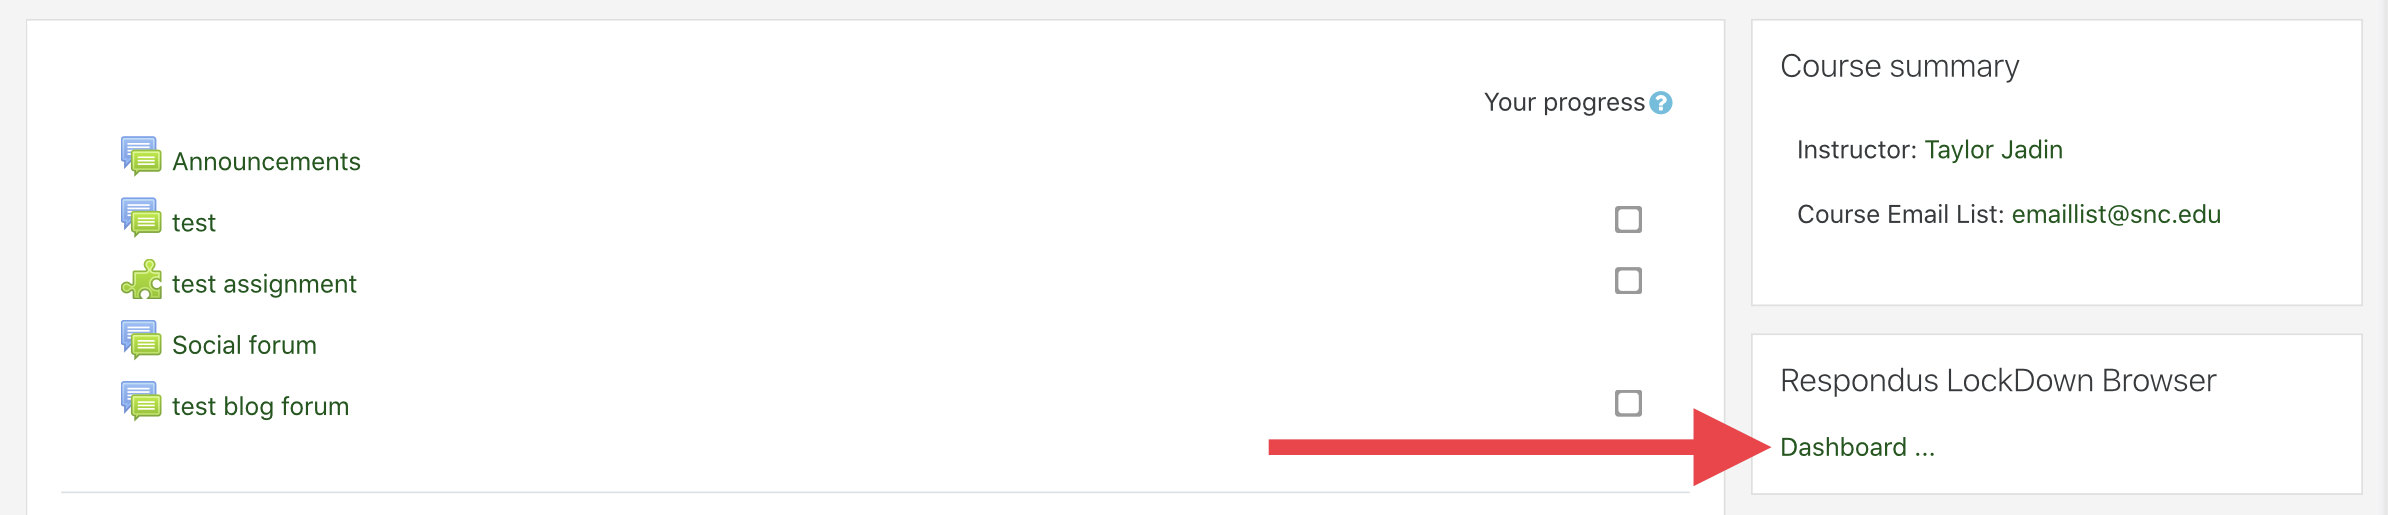 In the Respondus LockDown Browser block click Dashboard

From the Respondus Dashboard you can check which quizzes already have Respondus LockDown Browser
You can enable or disable LockDown Browser on whichever quizzes you like by clicking on the Downward pointing arrow next to the name of your Quiz and clicking on Settings. Next click the button next to Require Respondus LockDown Browser for this exam and save this setting by clicking on Save + Close
Providing Students with a Download link
If you are using LockDown Browser with a quiz in your course, you should provide students with a download link so that they can install LockDown Browser before your course starts. Here is the link:
https://download.respondus.com/lockdown/download.php?id=597944761
We recommend adding the link to your Moodle course, by using the URL tool. You could also email the link to students.
2.14.When Did My Students Last Access My Moodle Course?
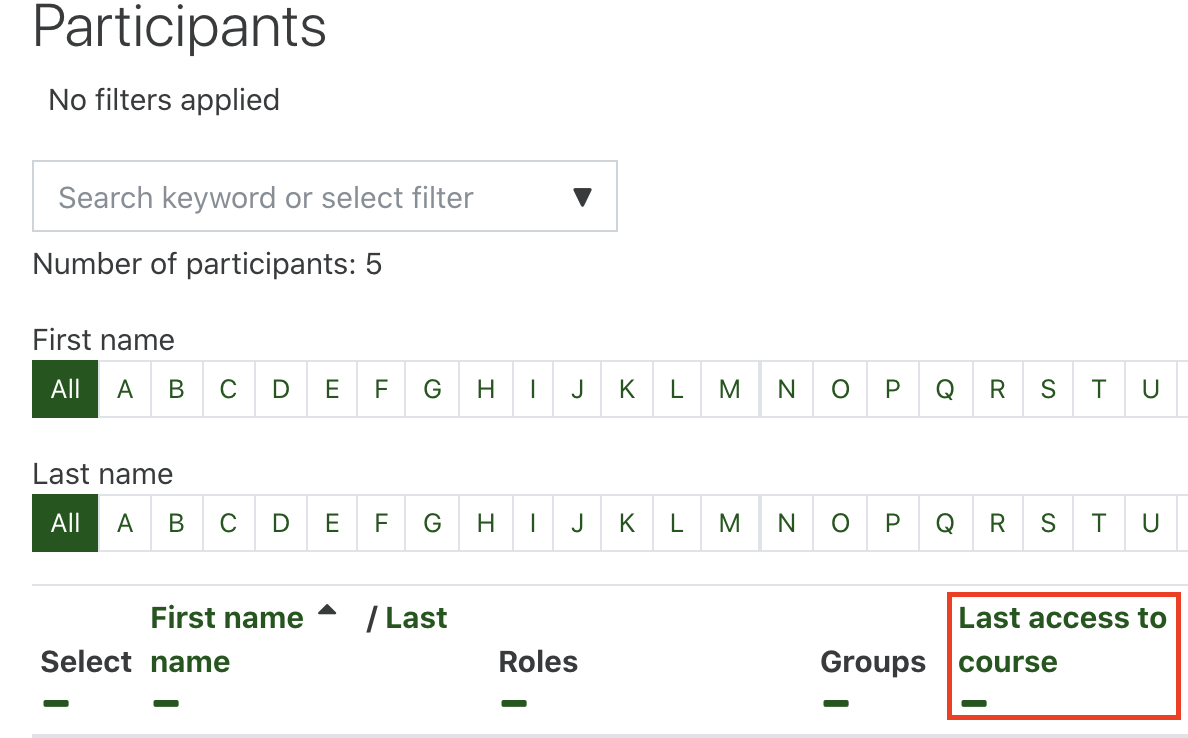
In your course, click on “Participants”.
The last time your students accessed the course will appear under the “Last access to course” column.
2.15.Set Up and Use Checklists for Completion Tracking
Checklists can be used to give students a visual representation of tasks that have been accomplished. Students mark the completion of these activities by themselves, so it’s useful for self-guided lessons. Like many things in Moodle, there are configurable options. You can explore those options, if you’re interested in that functionality.
To get started, click on “Turn editing on” in the top right corner of the course page.
Under the course section you’d like to add the checklist, click “Add an activity or resource”.
Select “Checklist” and click “Add”.

Start by naming your checklist.
By default, Checklists are graded items. If you’d like this to be more of a helpful tool, rather than a graded item, under “Settings” set the Maximum Score to 0.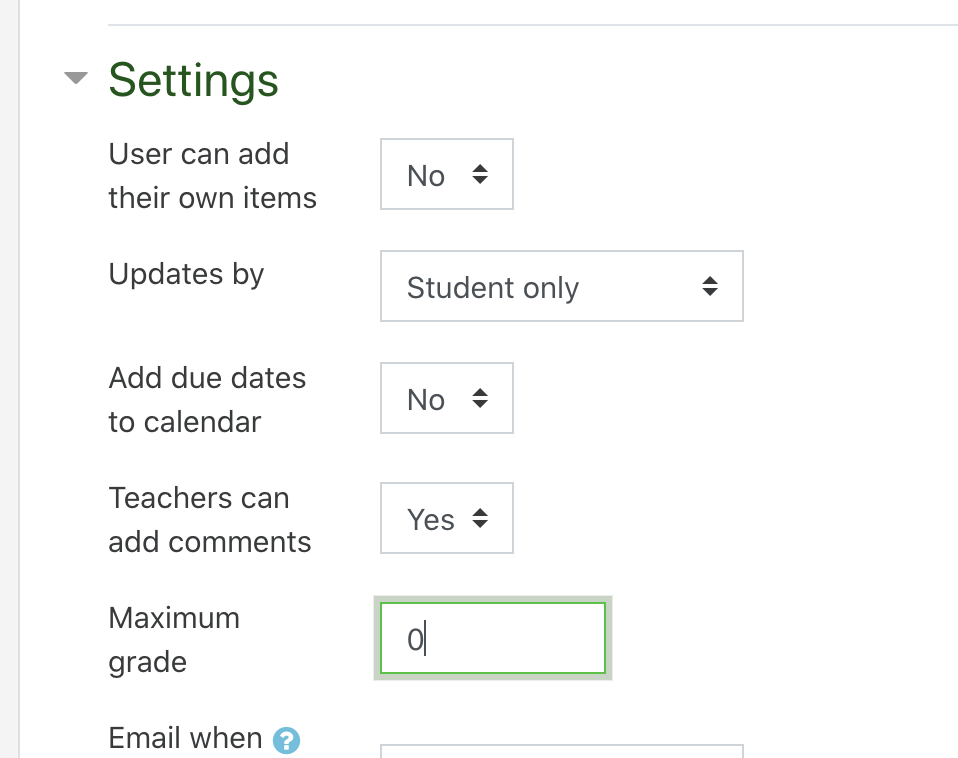
Once you’ve set your settings, scroll to the bottom of the page, and click “Save and display”.

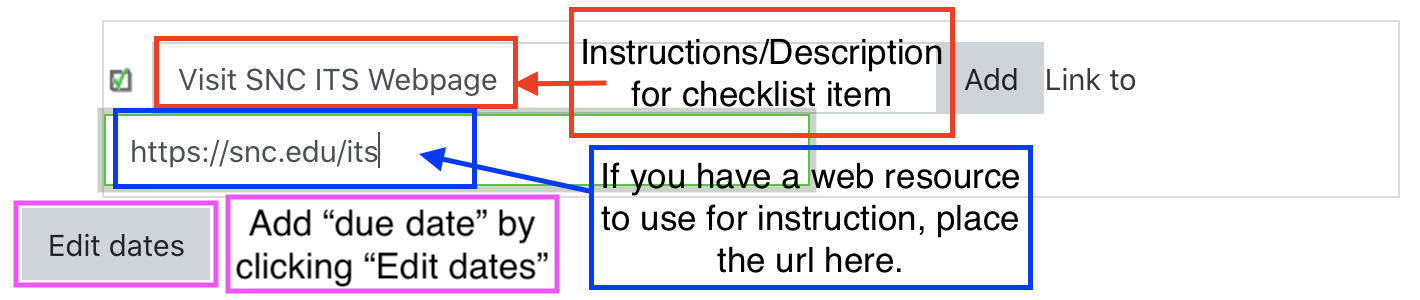
Go ahead and put your instruction/description, and URL you’d like to link to (if you would like to link a URL). You can also assign a due date to the checklist item, if you’d like those items to have a due date.
Click “Add” once you’re all set.
You can add as many items to your checklist as you’d like.
Once you’ve added all of your items to your checklist, click “View checklist”. 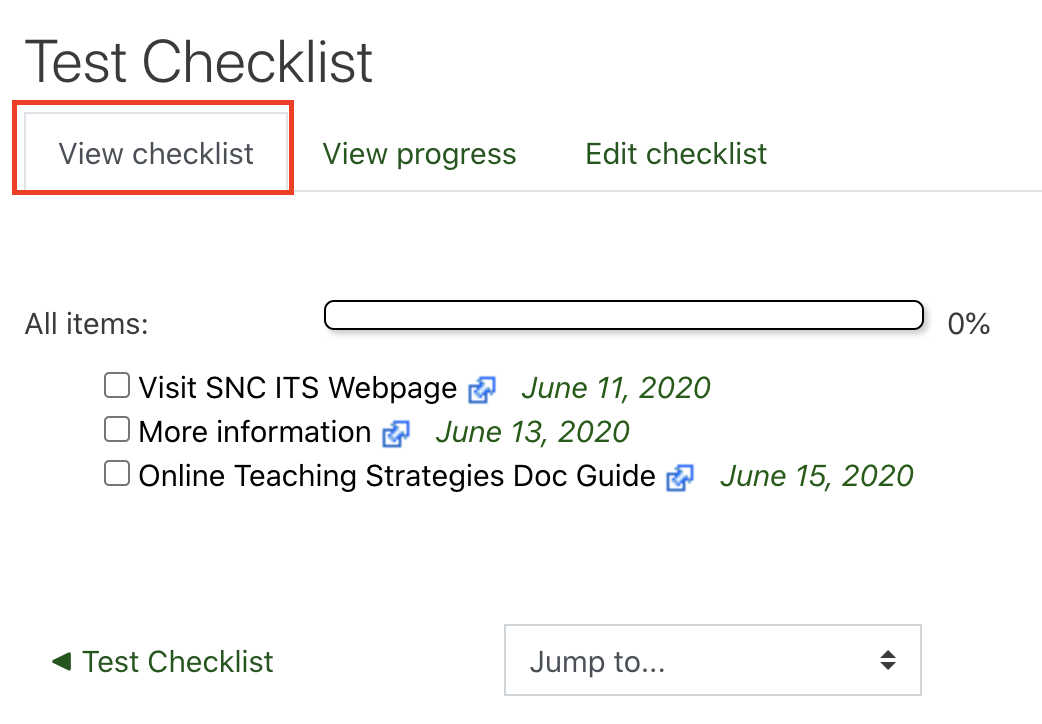
If you’d like to change your checklist, you can click “Edit checklist”. You can change individual items, or add new items to the checklist.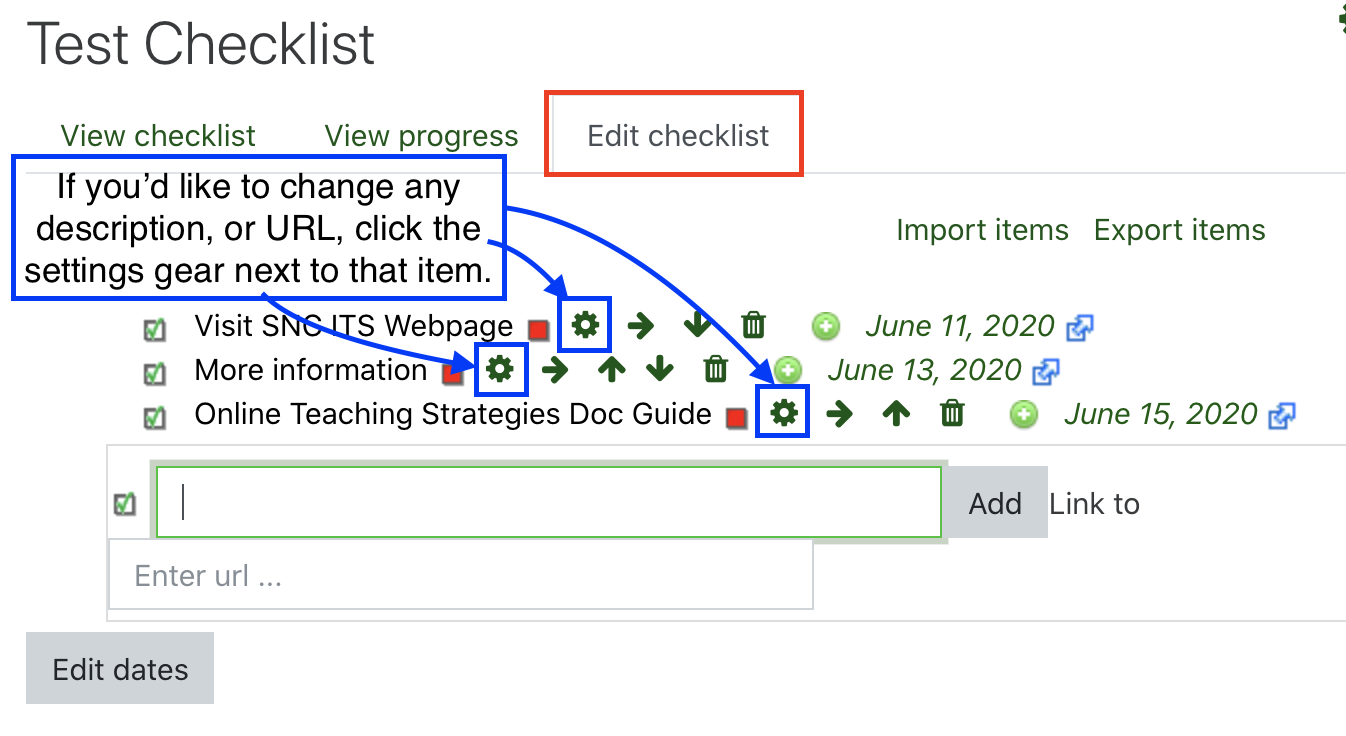
2.16.Add Another Instructor to Your Course
In the course, click on “Participants”.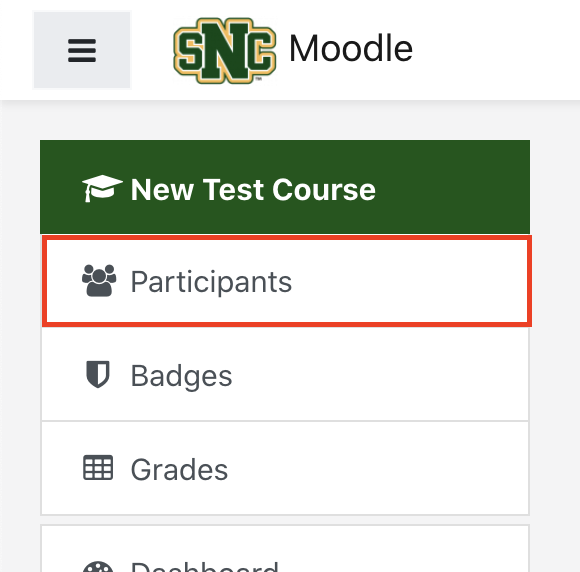
Click “Enroll users”. You’ll see this button at the top right and bottom right of the class list.
Search for the person you’d like to make into a Teacher of the course. Then, next to “Assign role”, select “Teacher” from the drop down menu. Then click “Enroll users”.

Here’s a helpful gif of the process.

2.17.Set Up and Manage the Gradebook
The following is a short list of common things that can be done to a gradebook to personalize it for your course.
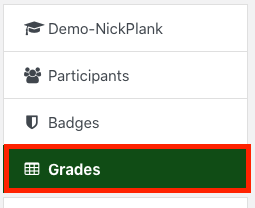
To get into your gradebook setup, click on “Grades” in your course.
Under “Grader report”, click on “Setup”.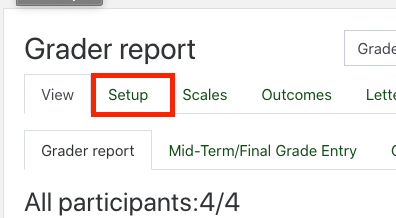
Adding a Grade Category, and Items to that Category
You may want to add a Grade Category to your gradebook to organize activities for ease of viewing. Categories are also used to change the weighting of a particular set of activities in your course, like Quizzes.
Near the bottom of the Gradebook Setup window (you’ll probably need to scroll down) click “Add Category”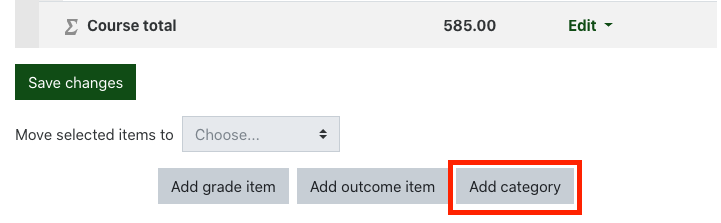
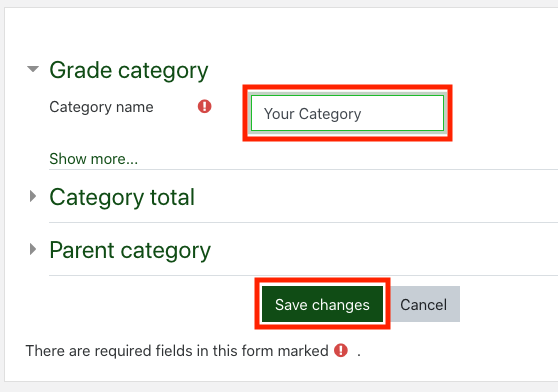
Name your Category whatever you’d like. If you’re making a category for quizzes, you could call the category “Quizzes”. Click “Save changes”.
To add activities from your gradebook to the grade category, click the checkboxes of the activities you’d like to categorize. 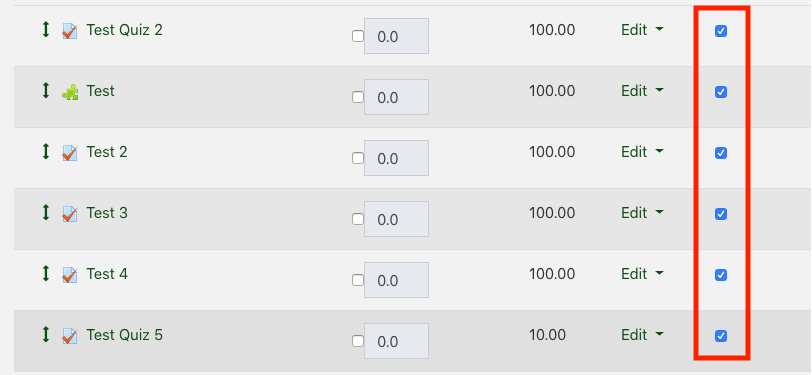
Then scroll down to the bottom of the page. Next to “Move selected items to”, change the drop down to the category where you’d like those items to reside. Click “Save changes.
Weighting
You can change the weighting of a particular category, assignment, or any grade item. Many people handle weighting by applying more points to some assignments than others, but Moodle handles weighting mathematically. By default, it will weight every point the same.
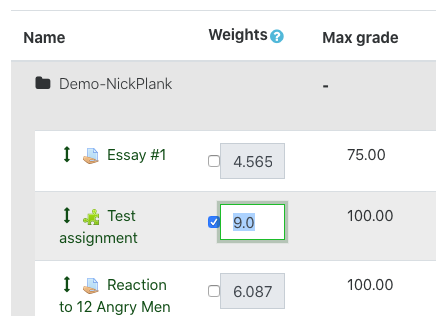
To weight an assignment or category, click the “Weights” checkbox next to the gradebook item, or category, and enter in a number to weight it. Once you’re done, scroll to the bottom of the page and click “Save changes”. This will automatically level everything else off, so the sum of your weighting is 100.
3.Gradebook
3.1.Categories and Weighting
The following is a short list of common things that can be done to a gradebook to personalize it for your course.
To get into your gradebook setup, click on “Grades” in your course.
Under “Grader report”, click on “Setup”.
Adding a Grade Category, and Items to that Category
You may want to add a Grade Category to your gradebook to organize activities for ease of viewing. Categories are also used to change the weighting of a particular set of activities in your course, like Quizzes.
Near the bottom of the Gradebook Setup window (you’ll probably need to scroll down) click “Add Category”
Name your Category whatever you’d like. If you’re making a category for quizzes, you could call the category “Quizzes”. Click “Save changes”.
To add activities from your gradebook to the grade category, click the checkboxes of the activities you’d like to categorize.
Then scroll down to the bottom of the page. Next to “Move selected items to”, change the drop down to the category where you’d like those items to reside. Click “Save changes.
Weighting
You can change the weighting of a particular category, assignment, or any grade item. Many people handle weighting by applying more points to some assignments than others, but Moodle handles weighting mathematically. By default, it will weight every point the same.
To weight an assignment or category, click the “Weights” checkbox next to the gradebook item, or category, and enter in a number to weight it. Once you’re done, scroll to the bottom of the page and click “Save changes”. This will automatically level everything else off, so the sum of your weighting is 100.
3.2.Extra Credit Setup
Moodle allows for Extra Credit graded items.
Please follow this guide to create gradebook categories.
The new category will appear at the bottom of the Gradebook setup. Scroll down to find it. Once you’ve found your category named “Extra credit” or whatever you named it, click “Edit”, then “Edit settings”
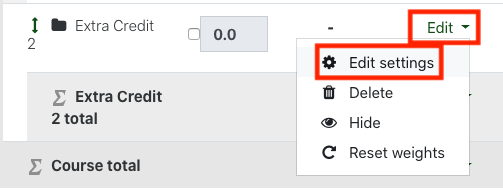
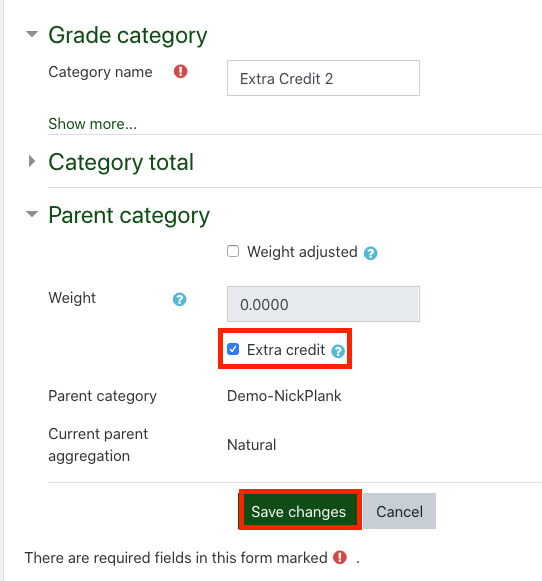
Check the checkbox next to “Extra credit”, then click “Save changes”
In your Gradebook setup, you’ll be able to tell if a category is extra credit, if the category’s point’s total has a “+” icon next to it.
If you have extra credit items created, select them (red outline, below), and move them (blue outline, below) to the extra credit section you created.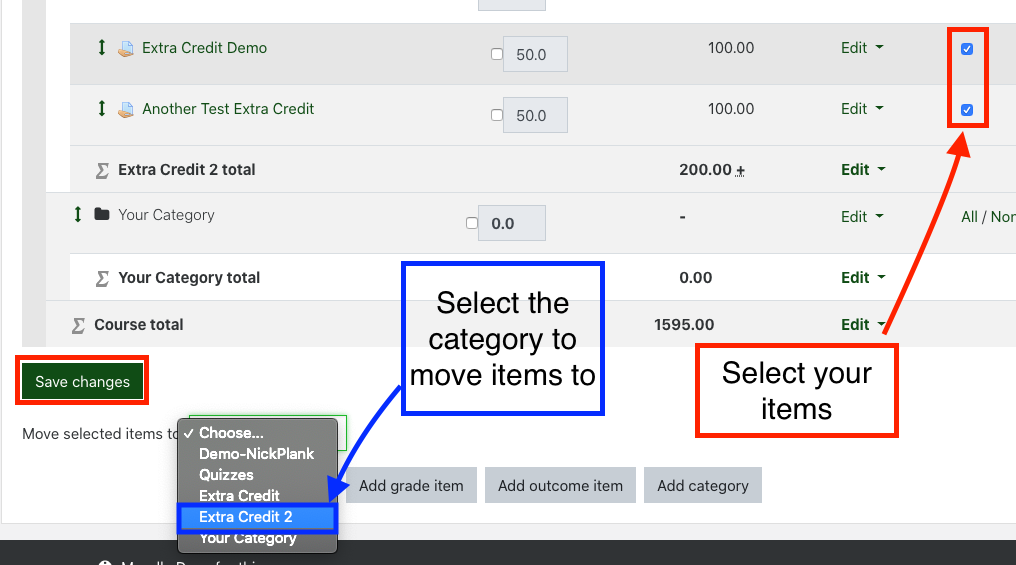
Be sure to not check the “Extra credit” checkbox on the individual gradebook items in the extra credit section. Those items will have no value, and you will notice that the point total of the section will not include those items’ points.
4.Academic Accommodations
4.1.Modify Quiz Time Frame
Moodle allows faculty to modify test taking attributes for individual students.
Open/Close Time Modification for an Individual
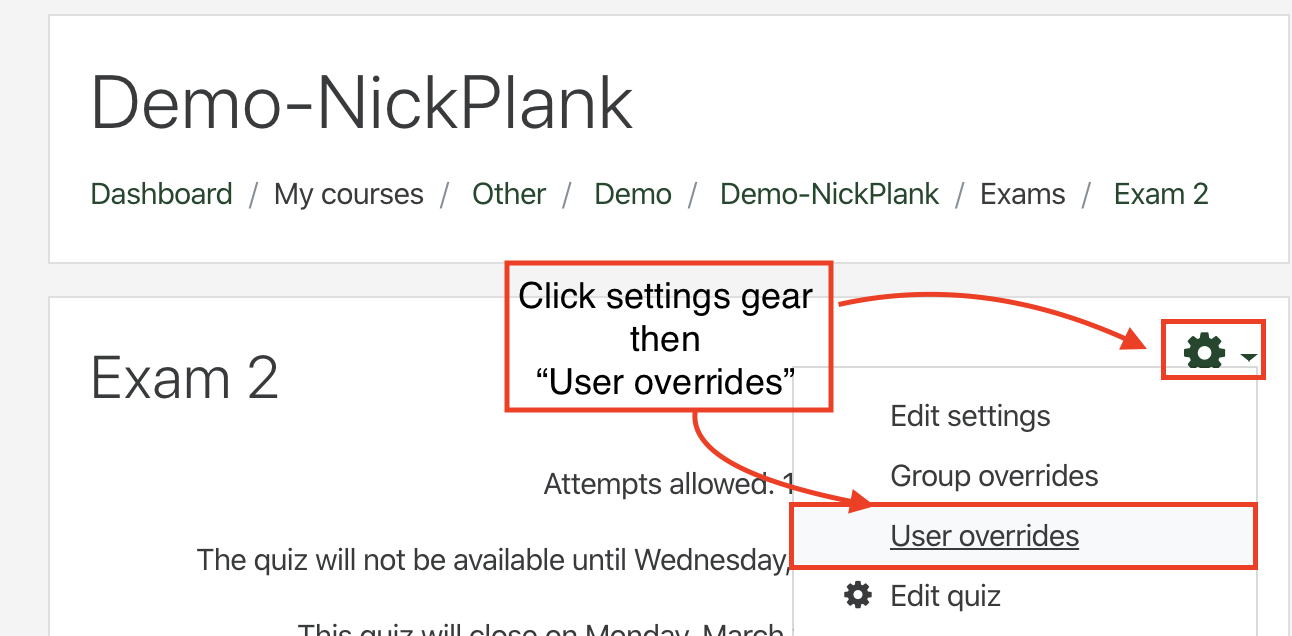
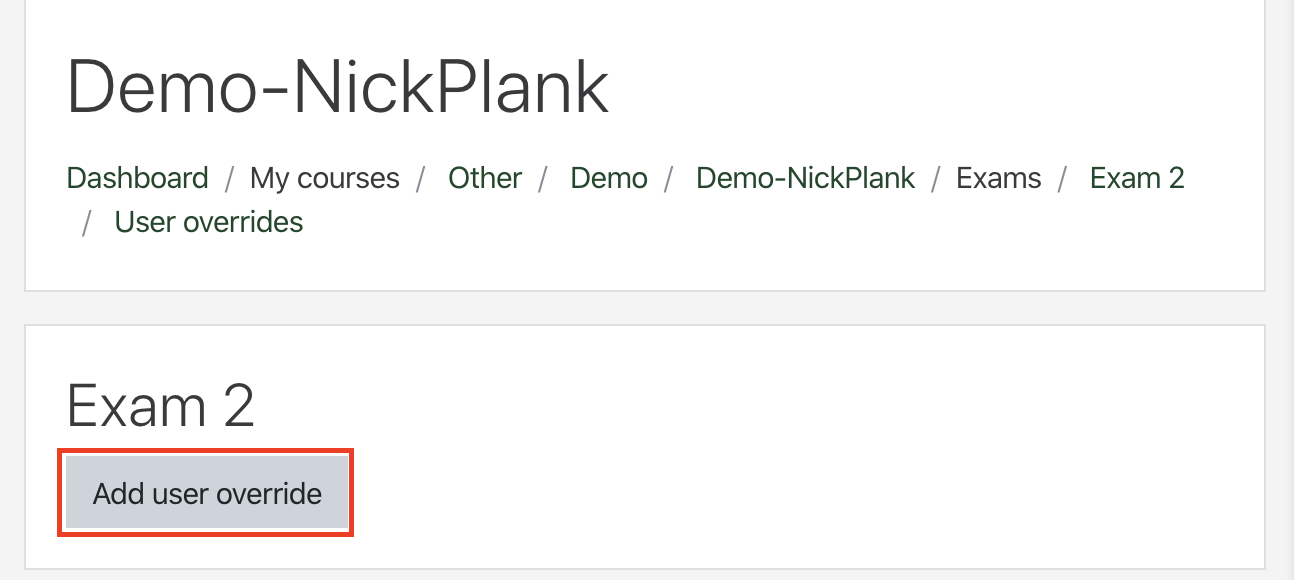
Go to your exam, and click on the Settings gear -> “User overrides”
Click “Add user override”
Search for the student’s name who needs a modification to the open/close time of the exam.
You can modify the “Open the quiz” and/or “Close the quiz” time for the student, depending what you’d like to accomplish.
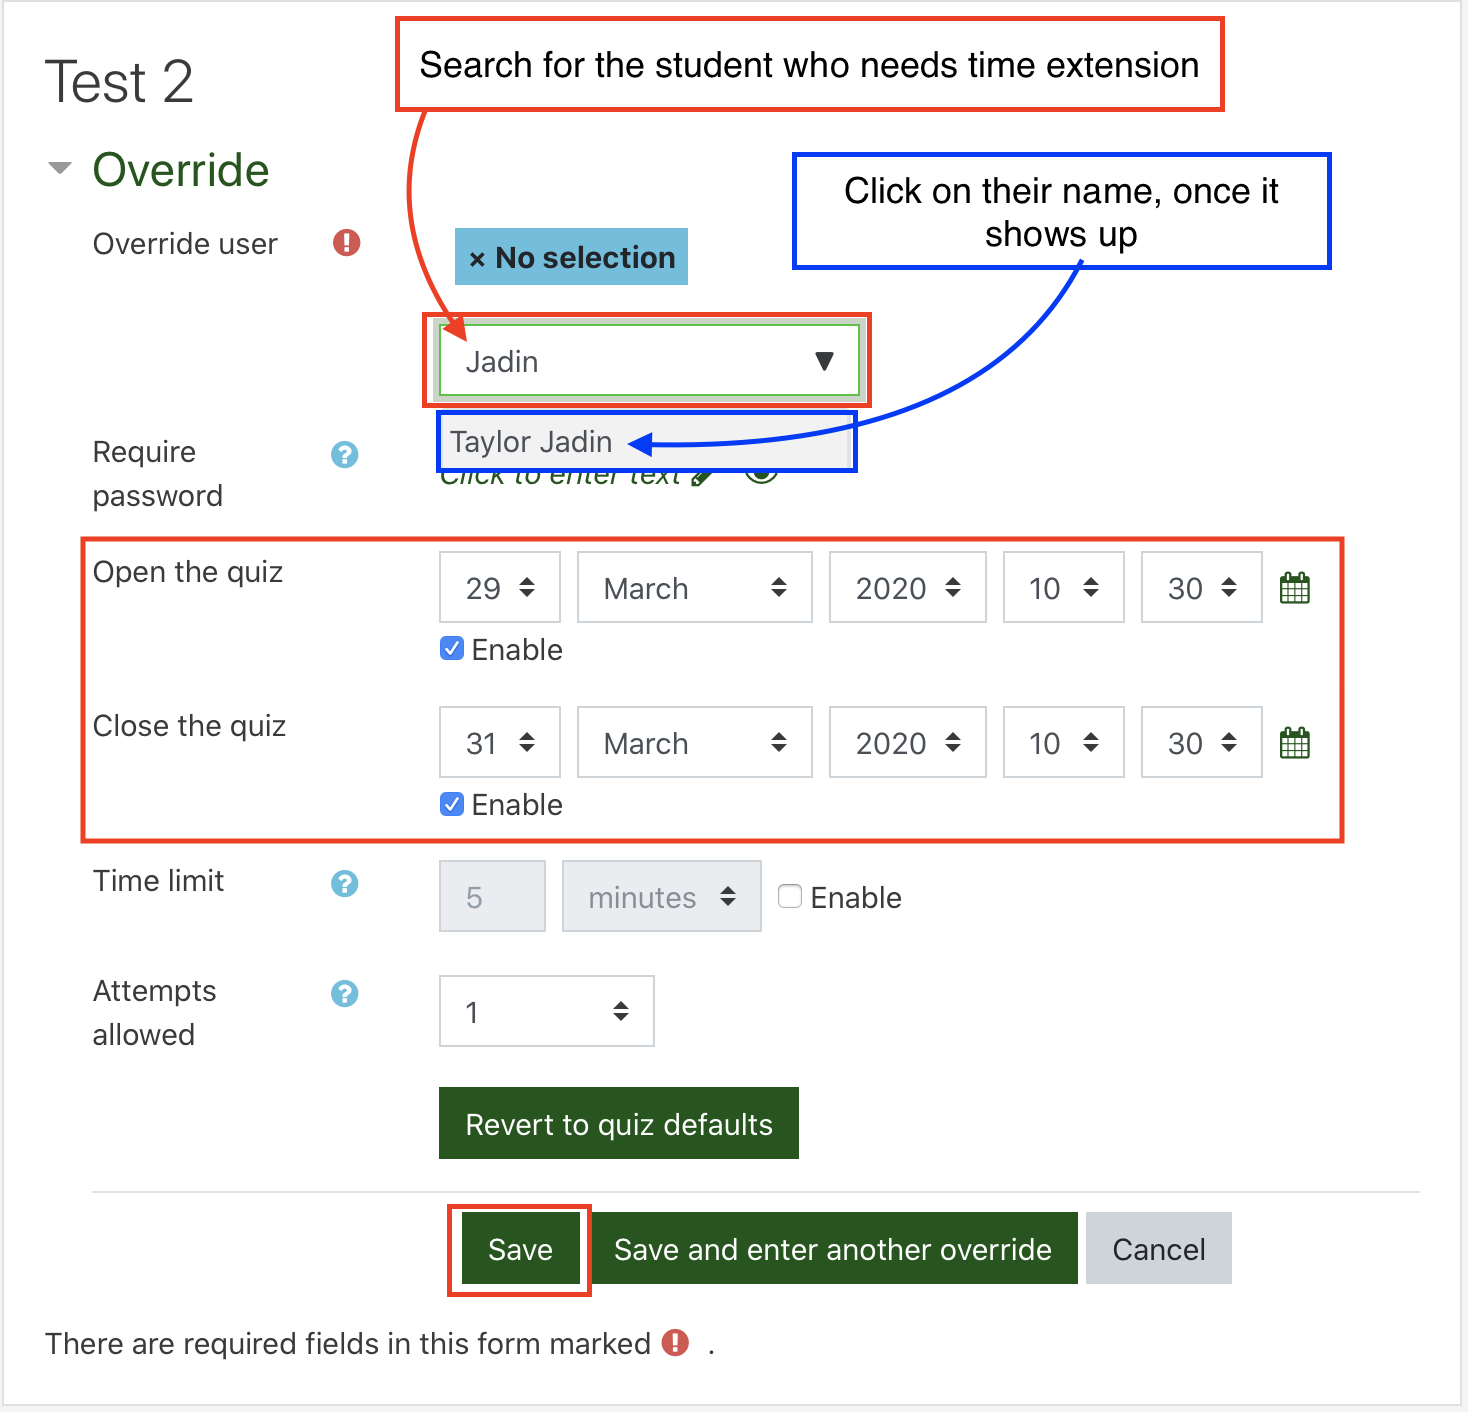
Click “Save” near the bottom of the window.
4.2.Quiz Retakes
Moodle allows faculty to modify test taking attributes for individual students.
Allowing a student to Retake a Quiz Activity
Go to your exam, and click on the Settings gear -> “User overrides”

Click “Add user override”
Search for the student’s name who needs to retake the exam.
You may need to modify the “Close the quiz” time and date, if the quiz is closed.
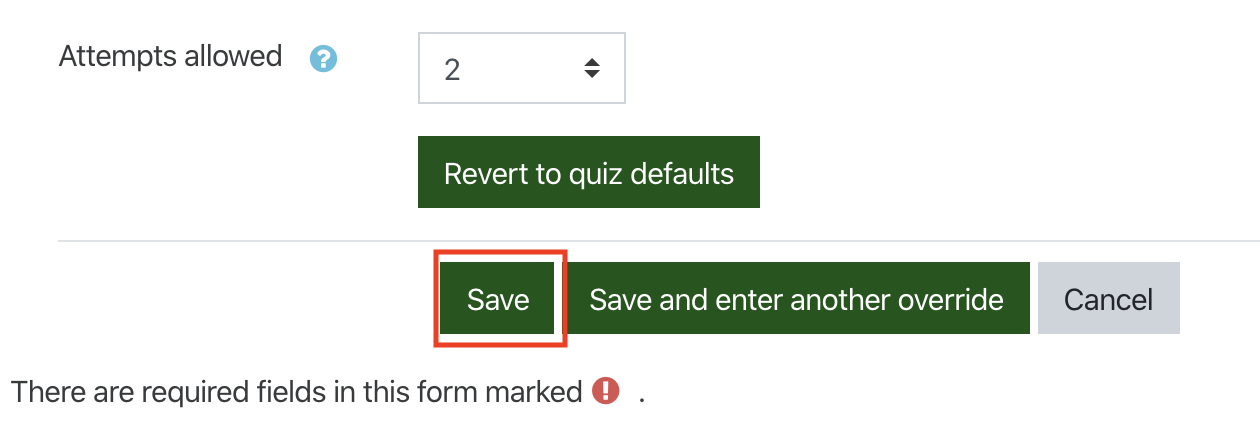
Next to “Attempts allowed” change, the drop down to “2”.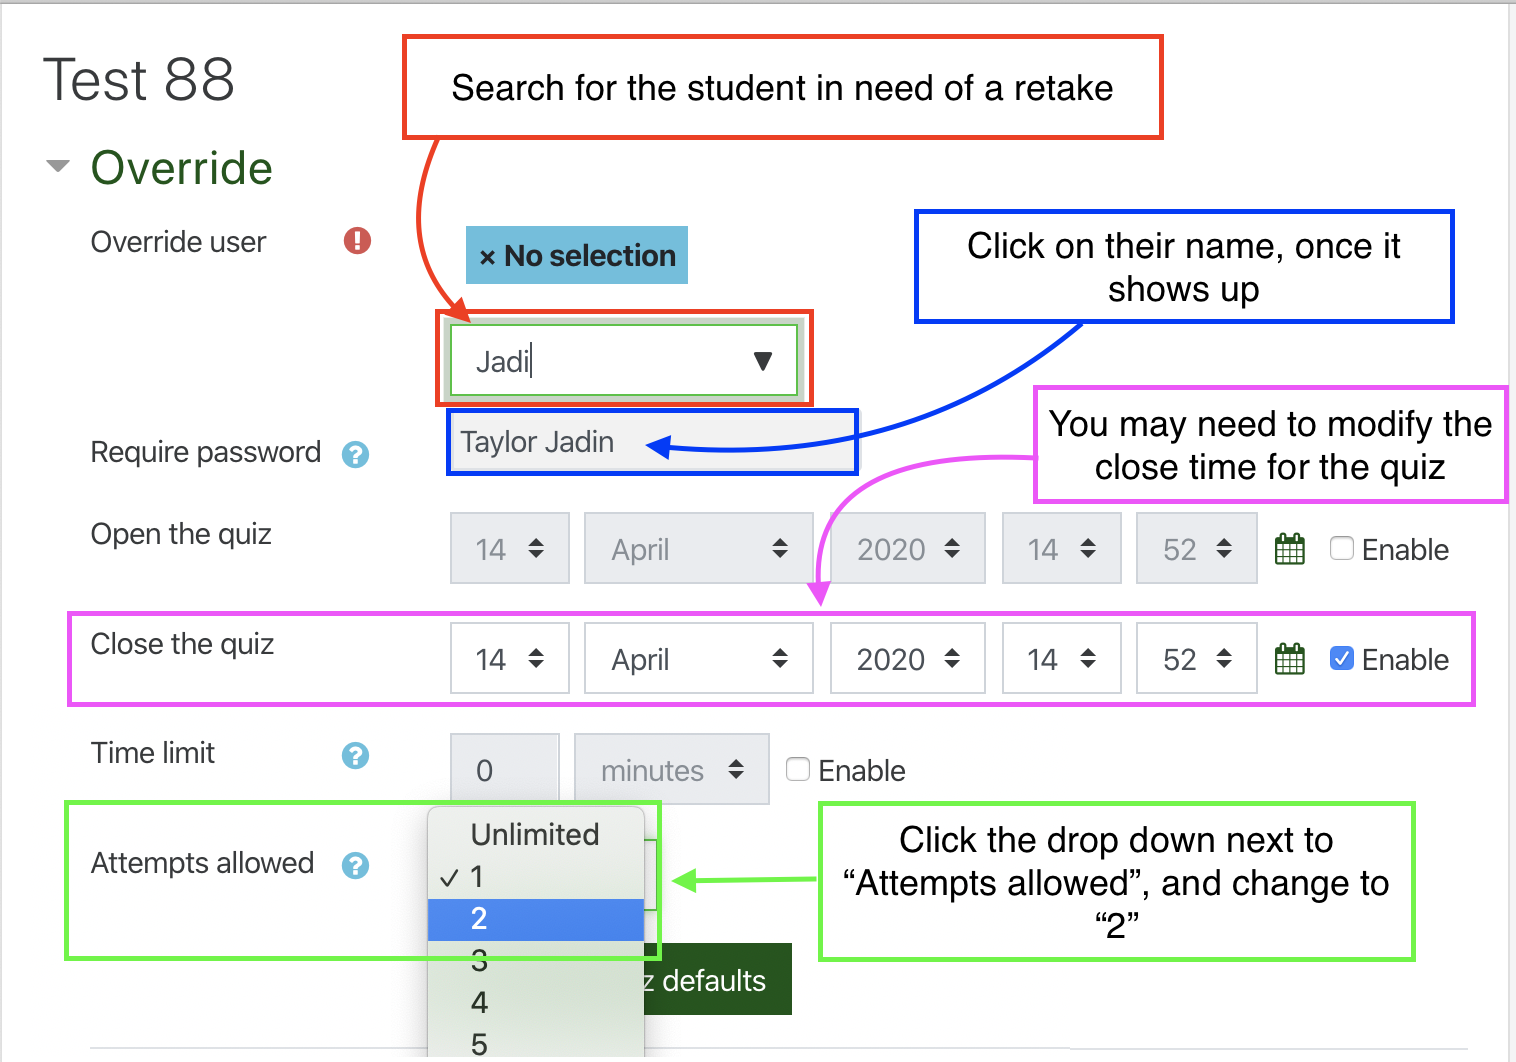
Click save near the bottom of the window.
4.3.Modify Quiz Time Limit
Moodle allows faculty to modify test taking attributes for individual students.
Academic Accommodations
To extend the quiz time for an individual student, go to your course in Moodle.
Go to your exam, and click on the Settings gear -> “User overrides”

Click “Add user override”

Search for the student’s name with the academic accommodation.
Modify the “Time limit” section to give the student more time.

Click “Save” near the bottom of the window.
5.Kaltura
When you record a meeting or class session in Zoom, the recording will automatically be available to you to add to your Moodle course.
Kaltura also has a lecture capture application (like Loom), that can be used to upload content directly to Kaltura, and can be added to your Moodle course.
Use the following documentation to get started with Kaltura in your Moodle course.
5.1.Adding a Zoom Recording to your Moodle Class
Zoom meetings are automatically available for you to add to Moodle, with Kaltura. You can add them to your Media Gallery, embed them in an activity’s description, or create a Kaltura Video Resource. Please see those individual sections, below.
5.2.Different Ways of Adding Kaltura Content to a Course
Kaltura allows you to add a video resource, embed content into an activity’s description, or provide a block of content that relates to a course in one place. All content in Kaltura has searchable transcripts, so students can search for keywords in any video to be brought to a section with subject matter they may have questions about.
The resource, called “Kaltura Video Resource” is added to a course like like any other activity or resource you would add to a course.
Kaltura allows you to embed a video any place where there is a description text field in Moodle. When you add an activity like a forum or assignment, you’ll see a “Description” text field. You can embed a video in-line into that text field.
In all of our Moodle courses, there is a “Media Gallery”. All of your course’s video content can go right to that spot.
5.2.1.Adding Video to Your Course's Media Gallery
Think of your course’s Media Gallery as a YouTube channel. It can contain all of the relevant video information for your course in one place. One of the coolest things about it? All of the videos transcripts are searchable.
While in the course, click on “Media Gallery” in the column on the left.

Click “+ Add Media”

Then, select the video or videos you’d like to add, and click “Publish”

To access this, the student would click on the course, then click “Media Gallery”.
5.2.2.Putting Kaltura Content into any Activity's Description

In any Moodle description field, you can add any of your Kaltura content. This means that you can create an assignment or quiz with inline video instructions. Of course, you can also add Kaltura content in any other description field, too.
You will also be able to add a video to an Activity or Resource. Anything that has a text field in Moodle can have Kaltura content.
On your course’s home page, click “Turn editing on” in the top right corner.

Under whichever topic/section of your course you’d like to add an activity or resource, click “Add an activity or resource”.

Then you can add any of the activities or resources you see. You’ll be able to add Kaltura content to any of them. For my example, I’ve made an “Assignment” activity.
Above the text box, you’ll see a new button that looks like a multi-colored sun. Click on that button.

Click “Embed” next to the video you’d like to include in the description.

You’ll know the video is embedded when you see the green linked embed code, like what you see below.
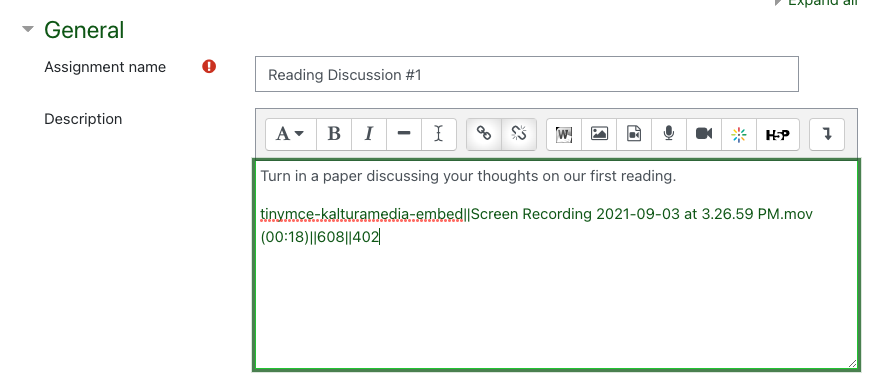
After you’ve embedded the content, finish setting up the activity or resource that you selected.
Click “Save and display”.
If setup properly, you will see an embedded video in the activity’s description.

5.2.3.Adding a Kaltura Video to a Specific Part of Your Course
You may want to add video to specific topics/sections of your course, rather than having all of your content in one media gallery.
Click “Add an activity or resource” in the topic/section you’d like your video to be.
Select “Kaltura Video Resource” from the activity chooser.

Name your activity, then click “Add media”

Find the video you’d like to include, and click “Embed”.

Then click “Save and display”.